JeanCarl's Adventures

AlchemyAPI Hack Night

May 21, 2016 | Hackathons

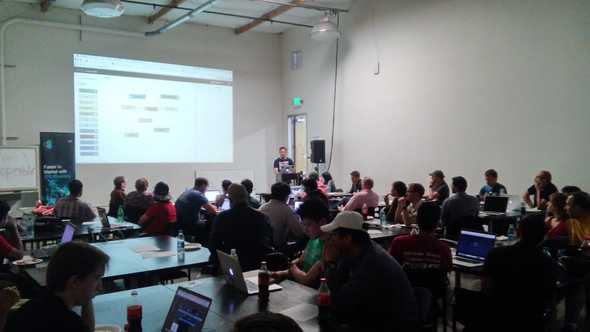
On Tuesday night, IBM hosted a Hack Night at Hacker Dojo. The topic of the night was the suite of APIs offered by the AlchemyAPI service in IBM Bluemix. We discussed three of Alchemy’s services: Language, Vision, and Data News. You can find the AlchemyAPI lab we used in my Node-RED labs available on GitHub.

Photo

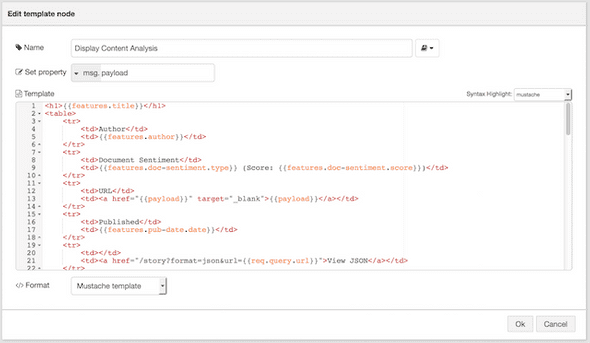
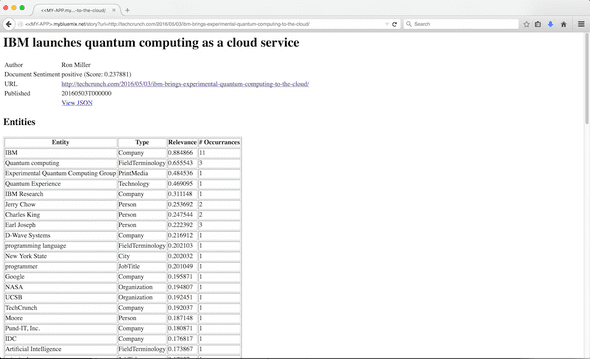
In the first part of the lab, I showed how to analyze a news blog post and extract entities, keywords, sentiment, emotions, and other attributes. The REST-based API is simple to use, allowing multiple types of inputs: text, HTML, or a URL where the content resides.

This lab uses Node-RED, a graphical interface of nodes built on top of Node.js. It offers a quick drag and drop interface to prototype ideas. You could also choose to use IBM Watson SDKs available in other languages if you want.

Photo

Photo

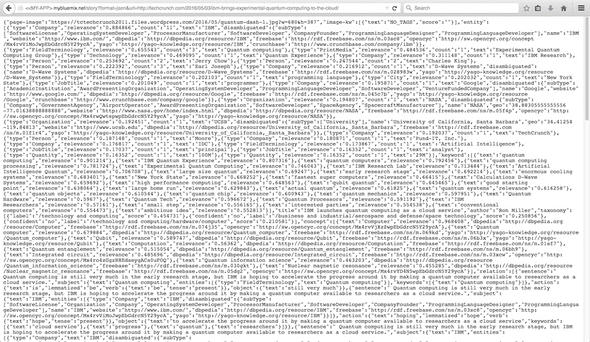
Keeping flexibility in mind, I designed the flow to output two formats: a human-friendly webpage and a JSON response. The JSON response flow could be modified to add more results from other services, or reduced with your own custom logic.

Photo

Photo

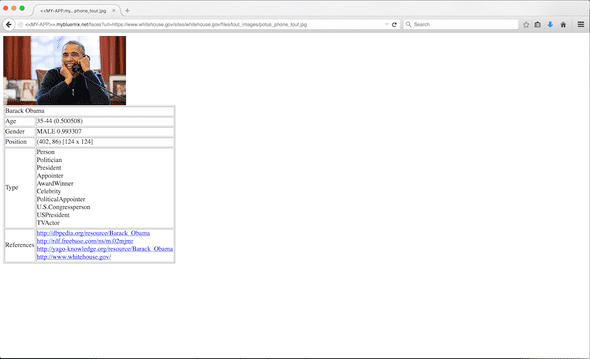
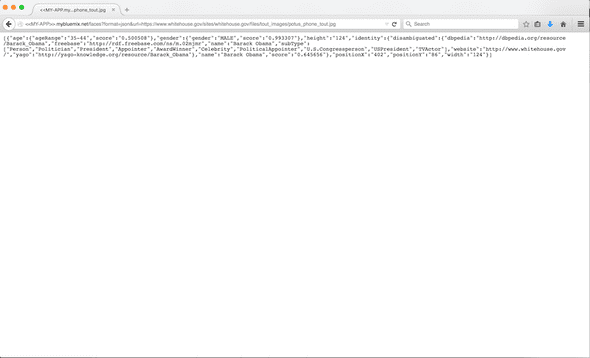
The second part of the lab showed how to use the AlchemyVision API to analyze images and get information about people pictured. For example, a picture of the President of the United States is recognized as Barack Obama and provides attributes like his gender and age-range, and categories (President, Person, Politician).

Again, the REST-based API is pretty flexible on the inputs: an image or a URL to an image. Did you know you can also provide a URL of a webpage where AlchemyAPI will look for the main image and analyze that?

I split the flow and display a simple webpage that’s human-friendly and also offer a option for a JSON response.

Photo

Photo

Photo

The rest of the evening was spent in groups brainstorming ideas of how the service could be used in new and existing applications. Some ideas that the hackers came up with included:

  • use AlchemyData News to determine if it good time to buy or sell stocks based on what the news is saying about a company
  • analyze Instagram photos to track trends over time of what is being photographed
  • ensure profile pictures on social networks are of people instead of cats
  • a conference room assistant that listens for keywords and captures images
  • an intrusion detection system that uses AlchemyVision

Hopefully this lab provides a starting point and understanding of what the Alchemy APIs offer and how easy it is to get started via the Node-RED boilerplate or in code directly interacting with the API endpoints.

Connecting SmartThings with Intel Edison and Particle Photon

May 05, 2016 | Node-RED

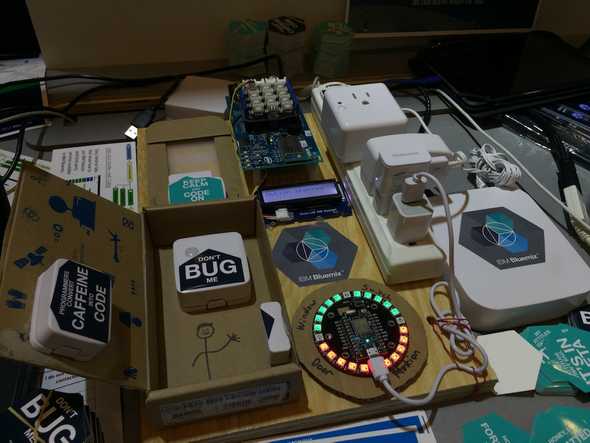
Last week I showed how I connected several pieces of hardware together for a demo at the Samsung Developer Conference. Much of the demo reused pieces that I’ve demoed previously. This blog post explains in more technical detail how to connect the various parts together.
Photo

SmartThings Hub

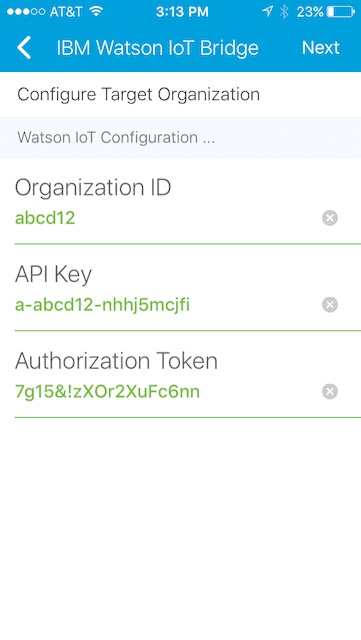
At the core of the demo is the SmartThings Hub. The door, window, and motion sensors, along with the outlet, trigger events that are sent up to the Watson IoT Platform. I first created a SmartThings application using the gateway app located in the ibm-watson-iot GitHub. Setup is pretty simple. Enter the credentials to the Watson IoT Platform and select what sensors should be used to track. The application automatically registers devices in the Platform and manages the process of sending events up to the Platform.
Photo

Photo

LED Ring

Using the Arduino code I wrote for the Tone LED Pin, I added the color black (the LED light is turned off), commented out the animateWipeClean function, and moved the FastLED.show() line as shown:

void callback(char* topic, byte* payload, unsigned int length) {
  // Sets the color for each pin based on the message from the Watson IoT Platform
  for(int i=0; i<length; i++) {
    switch(payload[i]) {
      case 'r': leds[i] = CRGB::Red; break;
      case 'g': leds[i] = CRGB::Green; break;
      case 'b': leds[i] = CRGB::Blue; break;
      case 'y': leds[i] = CRGB::Yellow; break;
      case 'p': leds[i] = CRGB::Purple; break;
      case ' ': leds[i] = CRGB::Black; break;
    }
  }

  FastLED.show();
}

Register this device in the Watson IoT Platform with a device type of ledpin.

Intel Edison

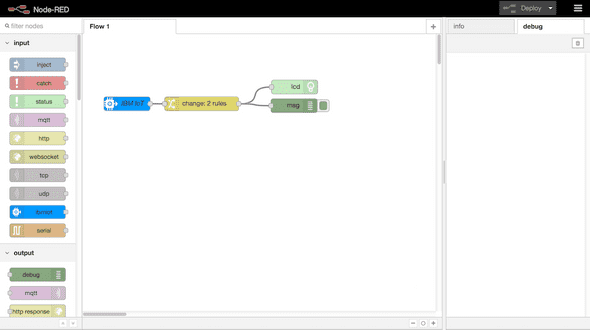
The Intel Edison has a LCD screen connected to the I2C port. Node-RED is installed with the node-red-contrib-grove-edison and node-red-contrib-scx-ibmiotapp nodes. The command to display messages comes into Node-RED via the ibmiot input node. The values of line1 and line2 are displayed via the LCD node.
Photo

Here’s the Node-RED flow JSON:

[{"id":"51d31af.698bee4","type":"ibmiot","z":"a6a7a597.21b96","name":"ls80t2"},{"id":"82cecd38.8aa928","type":"change","z":"a6a7a597.21b96","name":"","rules":[{"t":"set","p":"line1","pt":"msg","to":"payload.line1","tot":"msg"},{"t":"set","p":"line2","pt":"msg","to":"payload.line2","tot":"msg"}],"action":"","property":"","from":"","to":"","reg":false,"x":257.95001220703125,"y":151.20001220703125,"wires":[["9af32516.06ef48","2406d90f.a17b0e"]]},{"id":"9af32516.06ef48","type":"lcd","z":"a6a7a597.21b96","name":"","port":"0","line1":"Loading...","line2":"","bgColorR":255,"bgColorG":255,"bgColorB":255,"x":458.7833557128906,"y":114.9166488647461,"wires":[]},{"id":"4c925ea.04995a","type":"ibmiot in","z":"a6a7a597.21b96","authentication":"apiKey","apiKey":"51d31af.698bee4","inputType":"cmd","deviceId":"","applicationId":"","deviceType":"edison","eventType":"+","commandType":"display","format":"json","name":"IBM IoT","service":"registered","allDevices":"","allApplications":"","allDeviceTypes":"","allEvents":true,"allCommands":"","allFormats":"","x":96.70001220703125,"y":151.06668090820312,"wires":[["82cecd38.8aa928"]]},{"id":"2406d90f.a17b0e","type":"debug","z":"a6a7a597.21b96","name":"","active":true,"console":"false","complete":"true","x":457.6999816894531,"y":155.23333740234375,"wires":[]}]

Node-RED

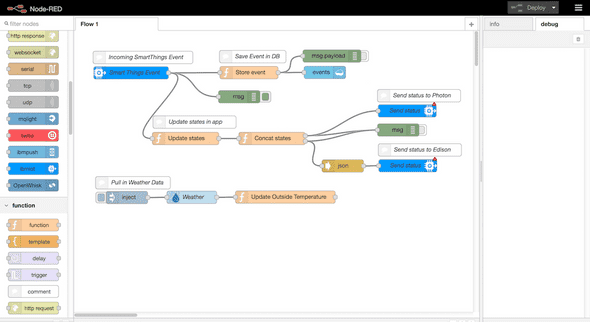
Much of the logic in the demo is performed in a Node-RED application in IBM Bluemix.
Photo

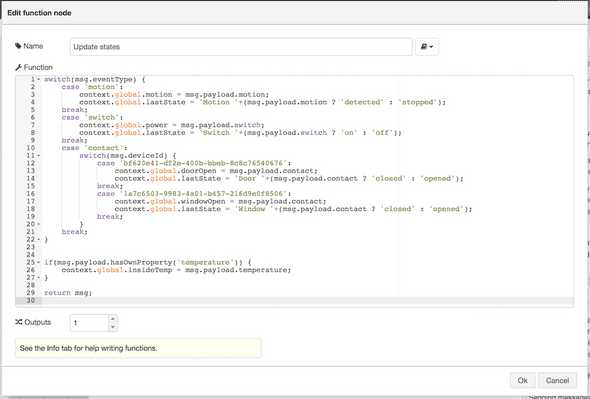
An ibmiot input node that listens to the device type smartthings and receives all the incoming sensor data. The guts of the application is located in the Update state node. Four global variables track:

  • context.global.motion - motion has been sensed
  • context.global.power - power is being used
  • context.global.doorClosed - door is closed
  • context.global.windowClosed - window is closed
Photo

If there is a temperature property in the event, I update the indoor temperature value that is stored in context.global.insideTemp.

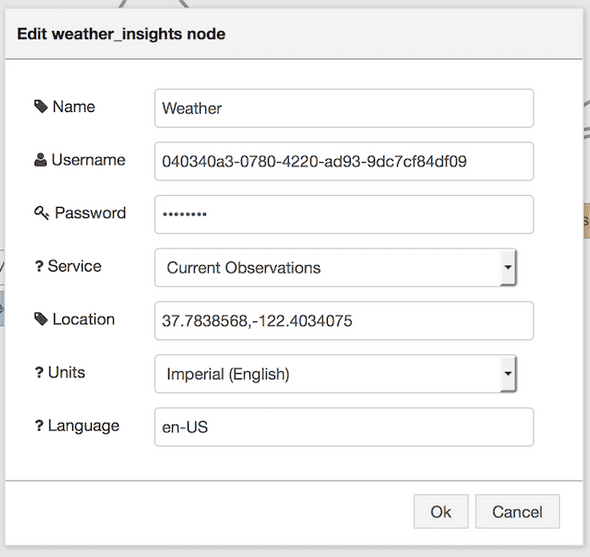
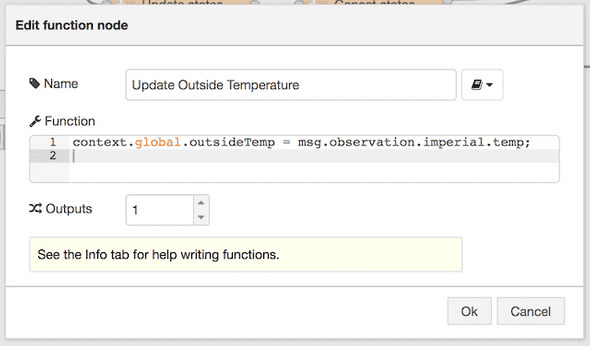
One last piece of data that is used is the outside temperature. Using the Weather Insights node, I pass the location to the Weather Channel API. I store the temperature in the global variable context.global.outsideTemp for use by the Intel Edison.
Photo

Photo

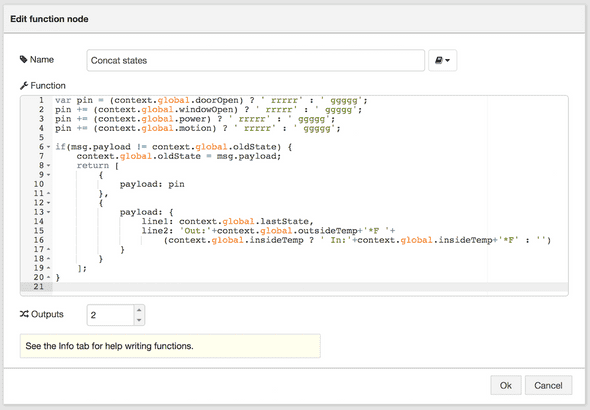
When a sensor emits an event to the Watson IoT Platform, the Node-RED application sends two messages out. First, the application constructs a string of 24 characters for the LED Ring. If the sensor is active (opened, motion sensed, or outlet is powered), I used the color red to convey some part of the home isn’t in a secured state. Otherwise, the color green is used. This string is sent as a command to the LED Ring.

The remaining code in this node composes a message that is sent to the Intel Edison. Three pieces of information are used:

  • context.global.lastState - contains the last action that the SmartThings sensors emitted to the Platform
  • context.global.outsideTemp - contains the Fahrenheit temperature outside
  • context.global.insideTemp - contains the Fahrenheit temperature inside
Photo

It was an interesting project to combine the different components together. It was also pretty simple to connect these separate components together via the Watson IoT Platform. There plenty of other things I could have connected together. What can you connect?
SmartThings demo at Samsung Developer Conference

April 28, 2016 | Conferences

The Samsung Developer Conference is currently underway at Moscone West in San Francisco. If you’re around, stop by and check out my most recent demo at the IBM booth. Today and tomorrow I am demonstrating how to combine several pieces of hardware into one project.

Photo

Using code for a SmartThings SmartApp from the IBM Watson IoT GitHub account, I have a SmartThings hub sending events to the Watson IoT Platform.

Photo

A Node-RED application hosted on IBM Bluemix listens to the incoming events. The application keeps the status of several sensors (door, window, motion, and a switch) in memory. When the status of a sensor changes, the application sends an update to a couple of other devices I have connected.

Photo

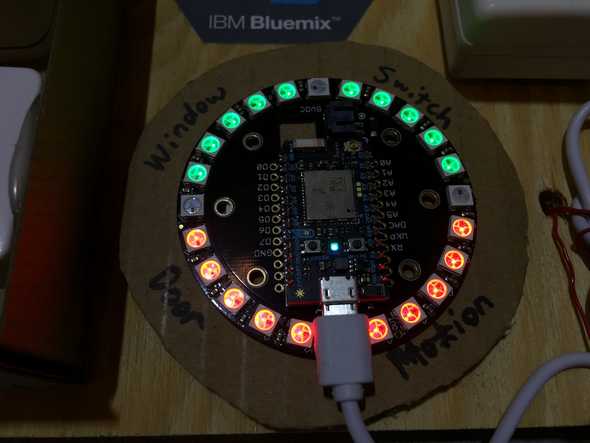
I reused my LED Pin example to show red and green LED lights for each of the four devices. Red lights in each quadrant represent the device being used (a open door or window, motion being sensed, or the outlet switch turned on). Green lights represent an inactive state (a closed door or window, no motion being sensed, or the outlet switch turned off). A completely lit LED ring of green could represent a state of my home being quiet and secured.

Photo

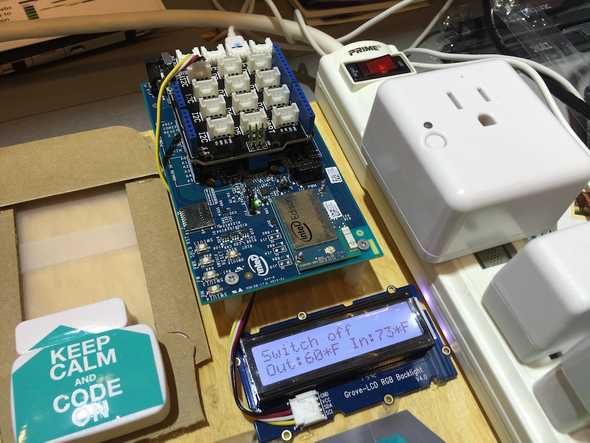
I also connected an Intel Edison board with an LCD screen to display the state of the last sensor that was reported. It also displays the outside temperature from the Insights for Weather service, and the inside temperature reported by a SmartThings sensor.

Photo

This was a fun demo to build using a variety of parts from different companies that might not normally work together. Using the IBM Watson IoT Platform and Node-RED, I was able to quickly combine the different components together. For those with experience using different standards and hardware, this can sometimes be challenging.

Stay tuned for the tutorial showing how I built the demo.

Creating a webpage in Node-RED

April 22, 2016 | Node-RED

I created my first webpage when I was a teenager using a hand-me-down computer and a 56k modem. I still remember that awesome feeling of being able to create something that could be seen around the world. That was the catalyst I look back on where I began my web development profession. Today, I get to inspire others with that same feeling by showing them how to create applications, which often include webpages.

When I first introduce attendees to my Node-RED workshops, I show how easy it is to create a webpage that can be shared with friends and family in a matter of minutes. Now, this isn’t a very complex example, but it is a great start for anyone wanting to dip their toes into HTML, JavaScript, and Node-RED.

You can download the complete tutorial in PDF format from my GitHub account.

Photo

Let’s get started by deploying a Node-RED application in IBM Bluemix. You can name your application whatever you want. The only restriction is that the hostname must be unique and hasn’t been chosen by another Bluemix user.

Launch the Node-RED editor by going to your application’s URL, appended with /red .

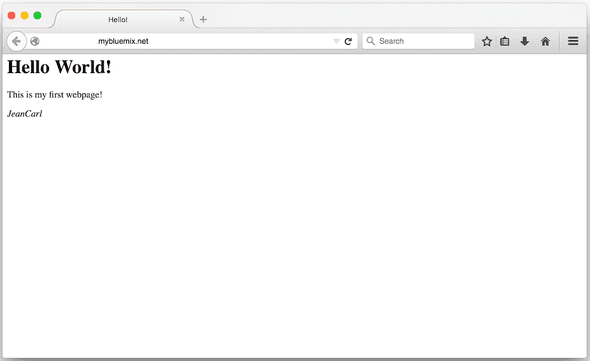
In the first section of the lab, I create a simple webpage that demonstrates how to expose an HTTP endpoint (another word for the part of the address after mybluemix.net/_) and return a simple HTML page back to the browser.

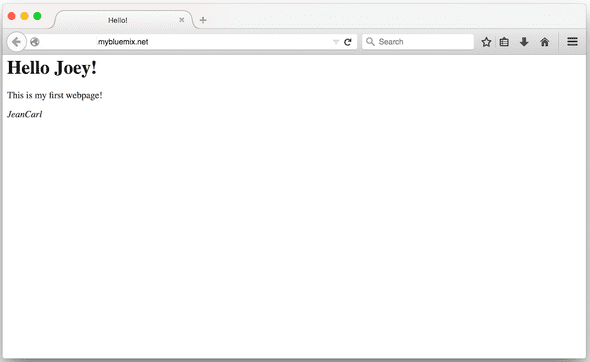
In the typical new programmer ritual, this example features a Hello World webpage and includes your name with some formatting.

Photo

Congrats! You can stop here, send your application’s URL to your friends and family and say you created a webpage. Pretty simple, huh?

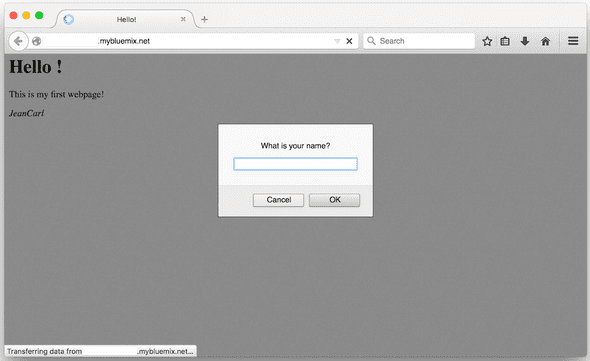
Actually, that’s far from the end of creating a real webpage. You can also include JavaScript. In the second part of the tutorial, I add JavaScript that prompts the visitor for their name. The JavaScript code adds their name in the greeting on the webpage. It helps to make your website feel more personal.

Photo

Photo

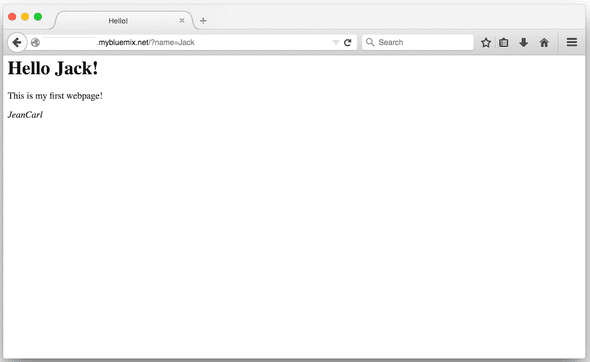
In the last part of the tutorial I show how to use a URL query parameter to include content in the webpage. Instead of asking for your friend’s name via a prompt, you could send each friend a custom URL with their name in the name query parameter.

Photo

Hopefully this tutorial has inspired you to try your hand at HTML and deploy some more advanced webpages via Node-RED. You can also check out the other Node-RED tutorials I have on my GitHub account.

Happy coding!

Trials of training a Teddy Bear to understand what I ask

April 19, 2016 | Projects

Recently I rewrote my Teddy Bear demo. The first version was Alex, who prompted the child about their emotions in a rather crude way. Turn a dial to select the option, and then press a button to commit that emotion to an application in the cloud. This worked, kind of. It demonstrated the concept of being able to capture and track a child’s emotion, and alert parents of potential problems.

Photo

But as I kept playing with Alex, the interaction started feeling more awkward. It was very limited. And I couldn’t, well, train Alex to interact in more complex ways.

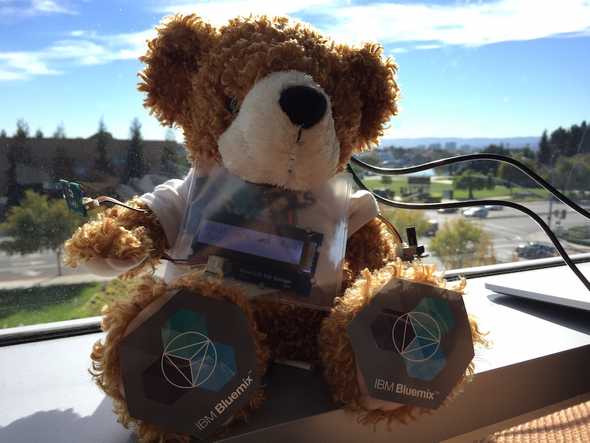
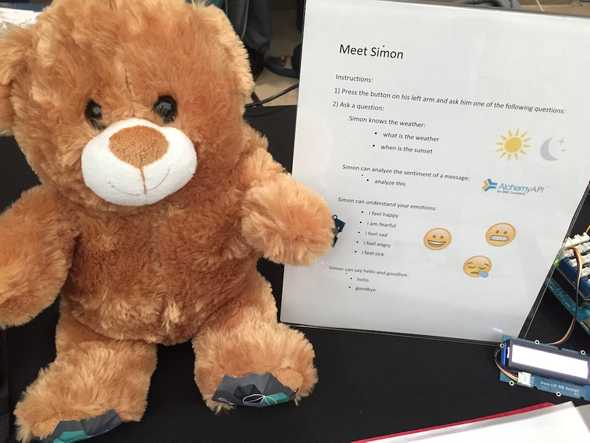
Simon is a v2 prototype and utilizes speaking capabilities as the main mechanism for interaction. First, a microphone captures the audio from the child, sends it up to IBM Watson’s Speech to Text service in IBM Bluemix where it is converted to text. The text is then processed in a Node-RED application in the Cloud. Some logic is performed to generate a response, and skipping ahead, Simon speaks the response using Watson’s Text to Speech service via a Bluetooth speaker.

Photo

Sounds pretty simple. Except that middle part. Taking in input with such a wide range of possibilities is actually pretty daunting for such a young teddy bear. Remember how hard it was to understand what adults said when you were a child? It is kind of like that. As the proud parent (ehem, the responsible developer) of Simon, I have high hopes of big advancements in his future. Okay, enough of that!

I started by training Simon with the weather. Given data from the Weather Insights API service (provided by the Weather Channel), I thought two pieces of data would be useful. “What is the weather?” returns the sky cover and temperature. “When is the sunset?” returns the time the sun will set, or has set if it the time has passed.

I also added a skillset that used the AlchemyAPI to analyze the positive/negative sentiment and return a response like “I’m happy to hear that,” or “I’m sorry to hear that.”

Okay, this seems pretty simple. I can scale these skills to construct some complex conversations, right?

Not exactly. When I had others try it out, they added slight variations. “When does the sun set?” or “What time does the sun set?” or “Simon, what is the weather?” Slight variations of the same basic question doesn’t make a simple this or that comparison possible.

I started to realize that not only is the English language pretty complex, but there are so many different ways of saying the same thing!

And there’s also another thing that I’ve realized watching this interaction happen with Simon. In the past couple of years, more and more voice-enabled products have trained us in different ways. Sometimes we mention the company’s name (Ok Google, navigate home), or sometimes we mention the product’s name (Alexa, what time is the game on?), to activate the listening capacity. Some of these products have a finite number of inputs, but there are quite a few products that let you say practically anything. And this is where a lot of processing power in the Cloud comes into play. Given lots and lots of information, finding an answer becomes a Big Data problem, part of which entails determining the probability that what is being asked could really mean this or that.

So does this mean it’s back to the drawing board? Not quite. Simon is the next step in an evolution. From visual to now being enabled with speech, the next step in the project entails finding more automated ways of teaching Simon about the world. Hopefully it won’t take twenty years and a college education for Simon to become that smart. Stay tuned.