JeanCarl's Adventures

Water Monitor: From learnathon to hackathon winner in 11 hours

October 15, 2015 | Hackathons

Last Friday, San Joaquin iHub, Café Coop, Restore the Delta, and IBM Bluemix hosted a learnathon/hackathon at the H2O hackathon in Stockton, California. Students, from middle schools, high schools, and colleges across the state attended the one-day hackathon to build prototypes solving challenges around water. From finding clean water to grow our food on farms to conserving water in our drought-stricken golden state, there were tons of ideas floating around.

Photo

I’ve participated in over a hundred hackathons, but this was the first time I saw a learnathon and hackathon work together. A learnathon is where the participants focus on learning how to get started with programming and discover the process of building their dreams into reality. A hackathon is more competitive and usually includes a deeper investment in coding and design.

At 8:30 on Friday morning, seven middle and high school students entered a classroom across the hall from the hackathon. They were shy, nervous, and had varying expectations. They opened up their laptops, connected to the WiFi network, and signed up for their IBM Bluemix account. Little did they know they had received the keys to a world of possibilities.

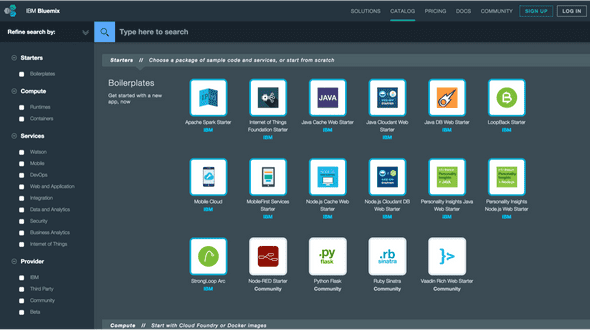
IBM Bluemix is a powerful platform that makes it easy to deploy web applications into the Cloud. The cloud development platform supports a variety of programming languages including PHP, Node.js, Ruby, Python, and Java. The platform also makes it easy to integrate with quite a number of services including IBM’s Watson to perform analytics and data processing and third-party services like Twitter and Twilio to send tweets and text messages.

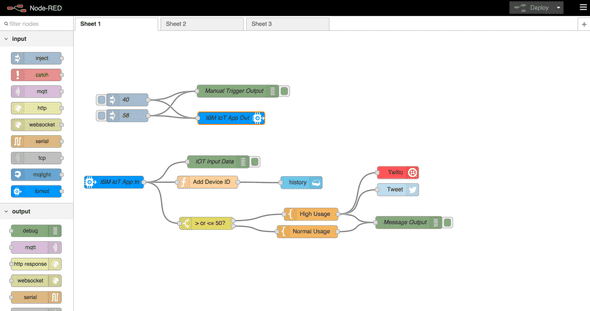
Once the students signed up, they launched their first application using the Node-RED starter app. Node-RED is an open source, Internet of Things graphical flow editor that makes it pretty easy and quick to start creating a backend.

Photo

The students learned how to create a simulated water sensor that would report the amount of water used each day. This usage data is sent to the cloud at set intervals (perhaps nightly, or even more frequently) where it was processed in their Node-RED application. This application included control logic, making decisions of what to do next based on the incoming data. For example, if the water usage metric was above a specified value, it could send a tweet with Twitter and send a text message with Twilio. This is a key concept in programming, and the students tested the waters with three-way switch statements, some matching an exact amount and learning the meaning of the <, >, ==, <=, and >= symbols, found in many programming languages.

The students turned down every offer of taking a break, instead persevering through each lab and learning yet another component they could harness. After sending messages, they learned how to store the water usage metrics in a Cloudant NoSQL data store, and how to retrieve this data. This could be useful if they wanted to chart the data for historical purposes.

Lastly, they learned how to use templates in Node-RED and linked HTML templates to HTTP input and output nodes to make them accessible using a web browser. They did the traditional Hello World webpage and became true programmers!

Photo

In true hacker style, the students broke for lunch, and as they gobbled up the pizza and soda, they started brainstorming ideas they could solve. Each student suggested their ideas to the team, opening up a conversation that was truly fascinating to watch. They listed the places where water was consumed, ranging from home to school to factories and farms.

They revisited their original ideas and revised them. The team collaboration and camaraderie between the students, from the youngest to the oldest was key in keeping the ideas flowing. There was no “stupid idea”. They pulled out their mobile phones and started showing off their favorite apps to get inspiration for design ideas.

Photo

With only about two hours left, they drafted up design mockups of what their mobile application would look like. They split into two teams, a design team and a programming team. The design team created the interface wire-frames, and the programming team worked with their Node-RED flow editor to build the simulation of how their problem would be solved.

As the clock ticked down, the stress level increased. However, they worked together as a team to get tasks completed, always making sure to communicate what was being worked on and any problems they were encountering along the way.

With the last wire-frame being hastily copied and pasted into the presentation as they walked down the hallway, they entered an adjacent classroom and presented in front of a set of judges. This was the first time for many standing in front of a group of professionals and judged. They presented their wire-frames and what the problem they were solving. A team member, Jeff, provided me with a summary of their mobile app:

When it comes to visualizing this app on the market, we’d like our consumers not only to have an easy experience, but perhaps a life changing one. We will give people this challenge. Can you change your water use habits? Our goal is for our users to be aware of how much water they use per day and perhaps to help them not only keep their water costs low, but to help our water deprived environment.

The team took nearly 15 minutes to present, a pretty impressive accomplishment. The judges asked some questions about where this app could be used and what could it accomplish in the future.

Photo

The students returned to the reception where they grabbed some dinner before they were honored for their accomplishments. Unexpectedly, they were then informed that the judges were so impressed with their hard work that they would be entered into the hackathon competition as a team. The hackathon competition consisted of college students and professionals who came with programming experience.

This was really impressive to see these seven students go from no coding experience to being judged against teams who were years ahead of them in experience. But they too had experience, even if it was only recently acquired. And they deserved the recognition for making such a huge advancement.

At the reception, they were invited on stage to present in front of the audience. This can be quite intimidating even for adults to present in front of a large group of people. But again, these students took the challenge and hit the ball out of the ballpark.

The judges finished hearing all the teams pitch and deliberated for three categories: Most Creative ($2500), Most Awesome ($2500), Most Thoughtful ($500), and the grand prize the Cal Water Golden Spigot Award ($3000). They had reduced the number of prizes and increased the prize amounts.

College students took home the first three prizes. It was time for the grand prize, $3000. When the students heard their team’s name, “Sprinkles”, announced, they stood up in disbelief and walked up on stage to receive the prize and have tons of pictures taken.

They had gone from no coding experience to learning the basics of coding, to working as a team, to brainstorming and building a concept, to winning the grand prize, in less than 11 hours. Talk about an amazing achievement that they can mention when they apply for college and for a job.

Photo

I can’t wait to see what these brilliant individuals can accomplish when they face new challenges. They truly represent what we can all do when we put our minds and energy to solving problems together.

Building your hack in 24 hours

October 06, 2015 | Conferences

This past weekend I had the opportunity to speak at Silicon Valley Code Camp. I shared with my fellow developers the process I have developed when participating at hackathons. The process is quite extensive, so 75 minutes was not long enough to get through quite the number of experiences I’ve had. Here’s a brief summary of what I mentioned.

I started off by sharing a little bit about me. I’ve been a web developer since I was a teenager. I started my first website to announce the “upcoming” short stories I was writing back then. I was a kid that enjoyed writing and pretending I was some kind of writer/developer/marketing extraordinaire. From there I continued building desktop websites, and eventually moved into more dynamic languages including Perl, PHP, JavaScript and HTML.

Within the last decade I’ve been more mobile focused, building responsive web apps for the iPad and mobile devices. I also picked up Node.js and some native development in Android along the way. I found my passion of hacking prototypes when I discovered what I could build in less than 24 hours. Had I not attended my first hackathon, I might have taken a completely different path in life.

In August 2009, I went to a Google Wave hackathon thinking I could get free food and maybe learn something about the social platform with robots that could interact amongst the community. However, I learned quite a bit from that experience, and how to handle failure. It turned out that I didn’t know Java very well, and I stumbled through session cookies trying to get the now-defunct API offered by Kayak working. I learned how team communication is key, and how a lack of communication can lead a team down a path of trouble.

Each hackathon since, I’ve always made sure to keep my teammates in the know of my progress and any blockages I might have, and to make sure I know any of theirs. You see, a Java programmer could have solved my hours-long struggle in a matter of minutes, had I only asked my teammate! Instead, I wasted hours, and ended up not finishing my implementation at all. How embarrassing!

Photo

But if you learn from failures, you can make them successes. After each hackathon, I write down my failures and successes so I can be reminded of what I’ve been through and what I have learned. Occasionally I peruse the list and see where I’ve improved, and what I still need to work on.

I also talked about my life experiences. I am a NASA enthusiast, watching rocket launches and getting invited behind the scenes of missions NASA is supporting has been incredibly inspiring to me. To see a rocket launch reminds me of all the hard work that goes into these missions. When you understand the amount of effort that is put into the mission, and the blood and sweat, you can’t help to appreciate what humans can accomplish when they work together. I’ve met my share of astronauts, and Hoot Gibson has quite a story to tell.
Photo

I have also travelled quite a bit around the United States, blogging about my journeys on 30daysoftravel.com. I have learned the different cultures across the states, and how some are less technical. Different places have different approaches to solving problems, and it is this differentiation that can be valuable to building products.

Photo

I mentioned some of the typical skills that a hacker can come to the hackathon with. From a designer to front and backend developer skillset, to business and marketing power, you have at least one skill. If not, you have a problem. Seriously, a problem to solve. Check out my guest blog post on AT&T’s Developer blog for more about that.

Over the last two decades, I’ve watched as the web environment has changed. We used to have web browsers rendering simple webpages. Then came mobile devices that changed the browser size of websites and added touch. Then hardware like the Raspberri Pi, wearables, and now the connected car have changed where we use these solutions. In the car, we use our voice and audio to interact with applications. If that wasn’t enough options, where do we host these solutions?

I talked about the cloud ecosystem, and how IBM’s Bluemix platform makes it easy to deploy your applications. Further, at the time of posting this, there are over a hundred services on IBM Bluemix that you can use in your hacks. From designing a mobile application using Kinetise, to integrating Single Sign On with Google, LinkedIn, and Facebook to your app, to analyzing the text people write in emails and ranking them on positivity using IBM Watson’s Tone Analyzer API, to storing data and running analytics on the data using dashDB. It would take many blog posts to showcase what Bluemix offers, but stay tuned!

The number of combinations available to hackers today are nearly endless. It’s a great time to get into hackathons and harness all these tools to build prototypes of your wildest dreams.

Photo

That’s why I joined the IBM Bluemix team as a Technical Evangelist here in Silicon Valley. I love to share my quick/quirky prototypes and how I build them with others, hopefully inspiring them to try it themselves. If I can walk away from a presentation knowing someone listened and absorbed how I approached the problem I solved, I have made a difference. I have received some really touching emails from college students who stopped by the IBM booth this weekend and are inspired to share with their universities the power of a hackathon. I have found my passion!

With a restraint of 24 to 48 hours at a hackathon, I emphasized how important it is to start small and think big! Using a jigsaw puzzle analogy, I try to make each part of my hack a puzzle piece. Mentally I know they fit together, but always have the option to switch them out if necessary.

If something doesn’t quite work, maybe the puzzle piece can be rotated (maybe the better word is pivoted) to work differently, and fit better. You know how the knob of the puzzle piece kinda fits, but you find out it really doesn’t? Grr, I hate that!

Completing a jigsaw puzzle takes time, so keeping things simple can show progressive progress. Once I put several puzzle pieces together, I can see a face to a human in the picture. In hacks, for example, I start to see how email messages can be analyzed using IBM Watson’s Tone Analyzer. My vision starts to come alive. I know eventually I’ll have a text-to-speech component to finish off the hack, but I keep it detached to help manage the stress level so I don’t get overwhelmed. I think big by planning the path I’m going to take given more and more time.

It’s important to start with things you already know. For me, PHP and Node.js are my go to languages. I build HTML/JavaScript proof-of-concepts because I can see things coming together visually pretty quickly. Click save and launch a web browser with your HTML file, and you can see instantly. Push it to IBM’s Bluemix platform in a matter of a couple of minutes, and share the URL with your teammates or scale worldwide. Times have certainly changed (for the better)!

As the number of hackathons under my belt have increased, I have worked on a large number of APIs and understand the patterns and commonalities they share. They all have their quirks and differences, but they act similarly. Your app provides data, said API does something, and it returns data back to your app. The API might store data, you might retrieve data from it, or it can do a variety of different things like send text messages.

Photo

Sticking with things you know best helps you get off the ground quickly. Once you have a base, expand your experiences. It is similar to a baby taking their first steps. They learn their motor skills and how to operate their arms and legs. Then how to wiggle on the floor, followed by elevating their butt and eventually onto their feet. They fall, but learn to get up. They conquer the balance equation, and they put one foot in front of the other. Success!

Over the last six years and a hundred hackathons, I have learned how to visualize what I’m building and piece by piece to build a prototype. APIs are so much fun for me because there is always something new to try out. The sponsors are always interesting to talk to and I enjoy understanding their marketing and branding process.

Sponsors come for a number of reason. First, brand awareness. If you don’t know they have an API, you’re less likely to build on their platform. They also want to see what others might build on their platform. It is one thing to have internal hackathons with your own employees, but having fresh faces on your API can be quite a difference. Taking those concepts back to the product team to enhance the product is also very valuable. Then comes partnerships. Some companies invite teams to followup and pursue the process of taking their concepts to market. Both parties benefit from that. Here’s an example of how AT&T helped publicize Read With Me.

I discussed how to tell a story when pitching your prototype. You want your audience to be engaged, interested enough to get behind your product. If you get passionate users behind you, they will end up marketing it for you! Judges love unique approaches. Don’t reinvent the same billion dollar startup that has taken three years to be where they are now. You will likely never catch up and always end up being behind your competition.

Another mistake I see frequently is using slides. Unless you’re pitching a business plan, slides waste the short amount of time you have on stage. Judges and the audience want to see what you were able to accomplish and build over the weekend. By the time you get through the slidedeck, you find yourself running out of time trying to showcase the demo. Avoid the slides all together and go directly to the demo! If you have time remaining after the demo, talk through the points you would have put on the slides.

Lastly, what happens on Monday morning? First, I sleep in! After all nighters, I crash before I get to eat dinner on Sunday. I wake up refreshed on Monday and start talking to my teammates. Find out about team commitments. Do you all have time to devote to making this a startup and really support customers when the going gets tough? It’s tough working a 9-5 job and coming home to do another shift building your startup. It’s not impossible to do, but some people decide it isn’t for them and slowly fade out of the picture. Set expectations to avoid misunderstandings.

Before you commit months of your life on the project, make sure there’s a market for it. Even though judges liked your concept doesn’t mean millions or billions of people will flock to it too. This feedback is an indicator you might have something, but you still need to do due diligence to see that this can lead to a business and success like an acquisition or a self-sustaining company.

I showcased some of my hacks which can be found on my travel blog and this blog. My DevPost profile also features a number of prototypes.

I ended my session by inspiring others to use the experiences they have along with those from people they meet. These experiences are what makes hacks unique and solve real problems. You just have to find an upcoming hackathon and jump in. You will find your passion and what you really like to do.

And in some cases, you can make a difference by inspiring others with proof of concepts you build at hackathons. I love to watch presentations at hackathons, giving me new ideas of things I want to try out and see what experience I can add to the concept.

Mention me on Twitter at @dothewww and let me know what hacks you come up with.

Kranky Geek WebRTC Show

September 12, 2015 | Conferences

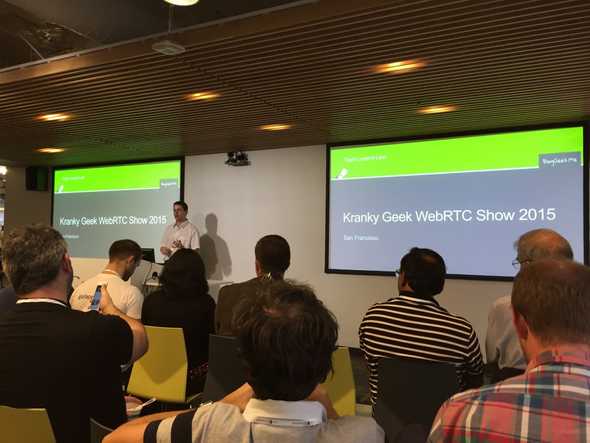
Today I went up to San Francisco to attend Kranky Geek’s WebRTC Show 2015, held at Google’s office. There were handful of speakers and the topics ranged from tips and tricks for a good WebRTC user experience, to more technical details of how to resume sessions and take advantage of the emerging platform.

Photo

Here is a recap of several of the sessions I found interesting from a beginner’s perspective.

User Experience with WebRTC

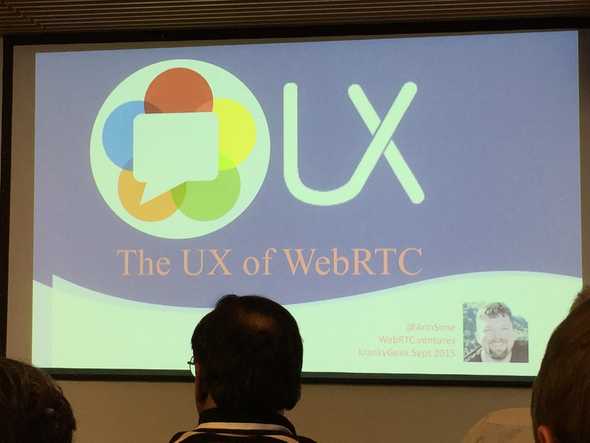
Arin Sime from WebRTC.ventures started the afternoon off by talking about how important the user experience is when using WebRTC.

Photo

Customers and users of our apps don’t care about the technology. Developers care about the technology. Users care about the experience in the application.

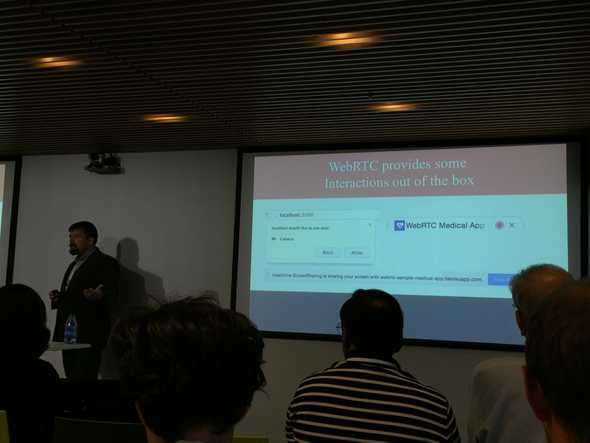
WebRTC provides interactions like block allow permission out of the box. The red circle in the tab alerts the user that the video/audio is live and reminds user which tab is using the camera. It also alerts them when they return to your application so they aren’t caught off guard having the camera automatically enabled.

Photo

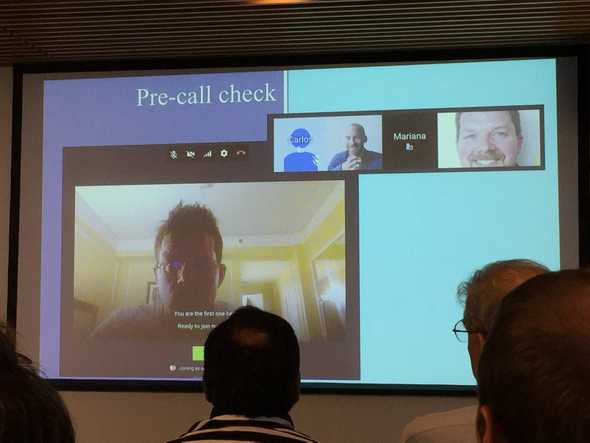
Pre-call check: shows video of what you will look like to others. Gives you a chance to check your hair and hide anything you don’t want visible. This screen displays names of the callers and shows the volume indicator to avoid being on mute by accident. Showing your own camera also helps the user know which camera is being used.

Photo

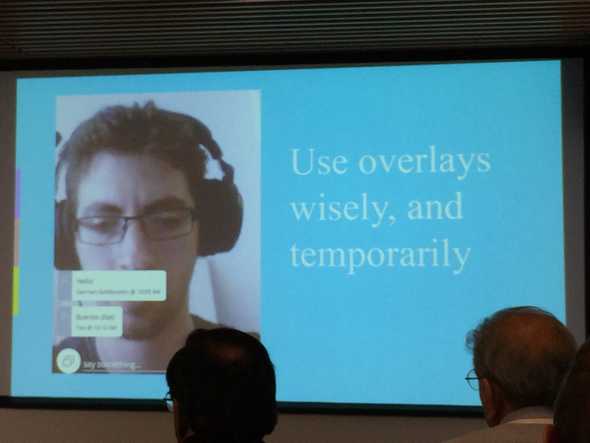
Desktop and mobile experiences are different. Desktop allows more real estate for larger videos. Mobile devices stack videos and use overlays to present buttons. Like in the Periscope app, use overlays wisely and temporarily.

Photo

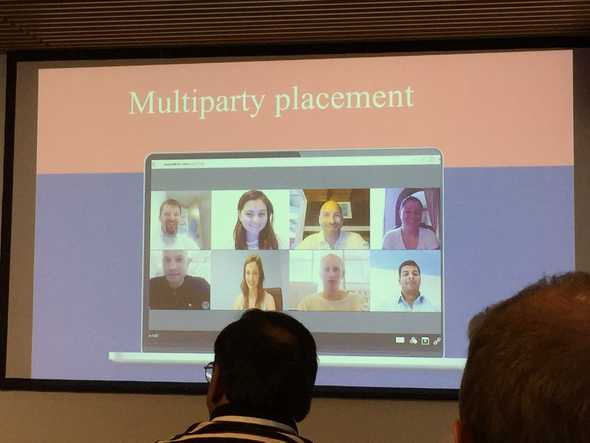
Multiparty chat: each party receives equal real estate in the grid. Making the speaker’s video larger helps users distinguish who is currently speaking.

Photo

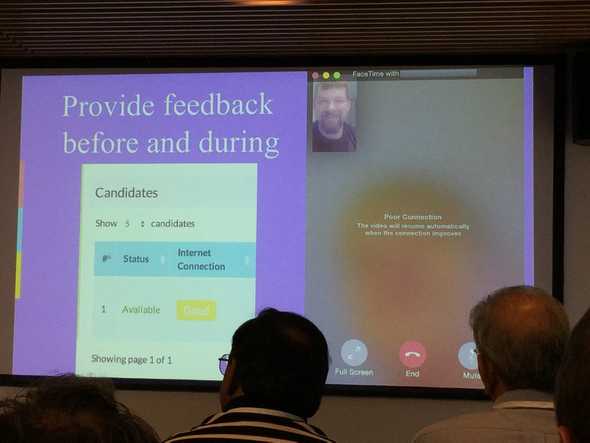
Tell the user how their connection is before the call, and also during the call with a Poor Connection warning. Before the call, show a testing stream capability screen to improve the experience.

Photo

During the call, determine what is the most important thing. During screensharing, participant videos are located in bottom corners, the screen being shared takes the most space and offers the best quality.

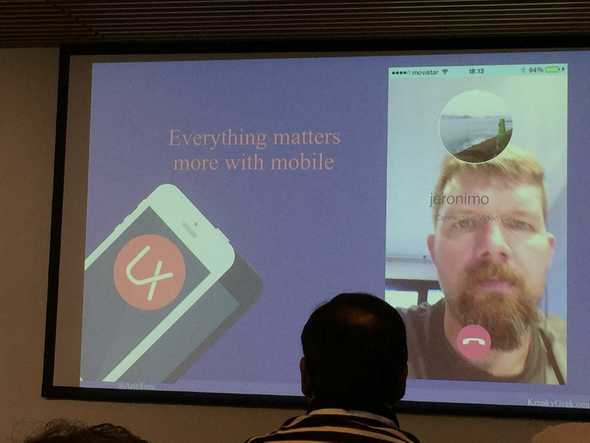
Because mobile is more constrained, everything matters more with mobile. Features include showing video of face to help framing, name of person to identify who is the active speaker, and conventional parts of calling including the disconnect button. Most important features dominate and don’t distract.

Photo

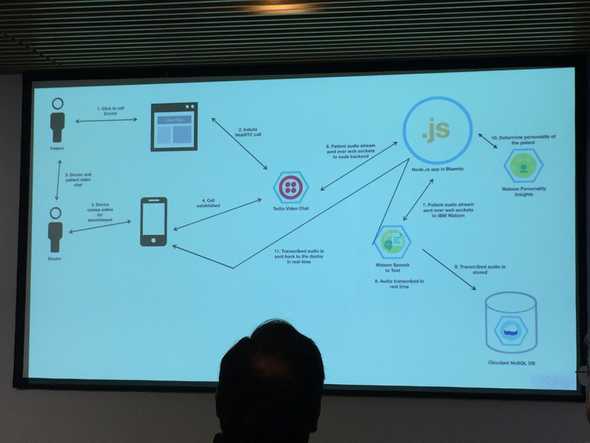
Doctor, patient video conference using Twilio and IBM Bluemix’s Watson Transcription Service

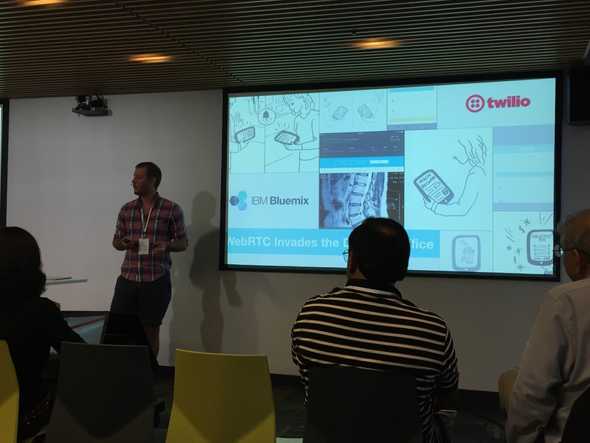
Next up was Jeff Sloyer, a developer advocate with IBM Bluemix, who showed a demo of a video conferencing flow between a patient and a doctor.

Photo

The demo used Twilio’s WebRTC service, along with IBM’s Watson to transcribe the conversation between a doctor and a patient.

Photo

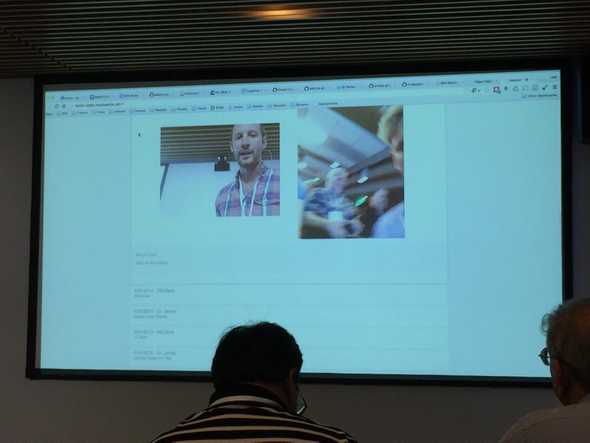
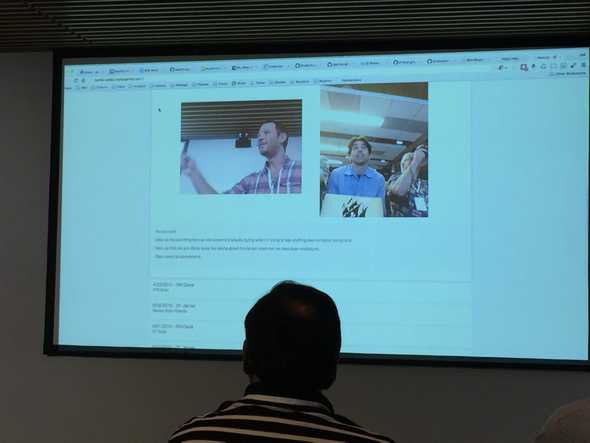
The audio of the conference is streamed to Watson over a socket and is translated into text. The text is shown on the doctor’s screen to help transcribe what was discussed.

Photo

As for the HIPAA compliance, IBM Bluemix is compliant and the data is transmitted over a secure connection.

Photo

Streaming a HTML5 canvas to WebRTC

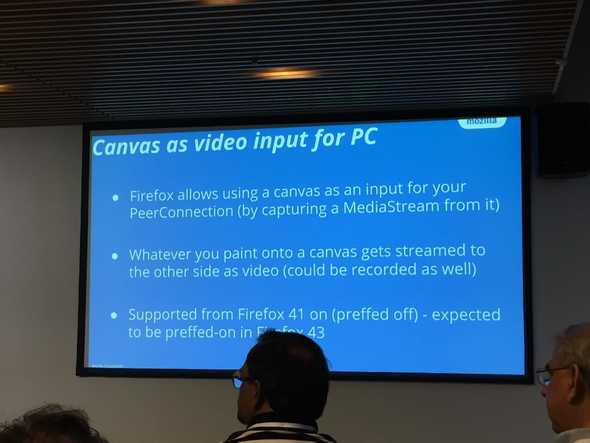
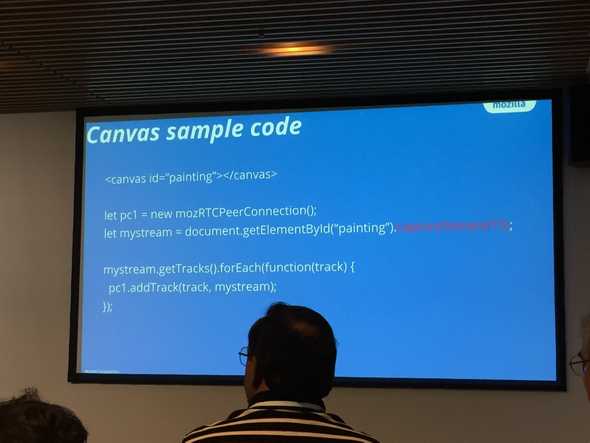
Nils Ohlmeier from Mozilla showed a demo using the HTML5 canvas to draw onto and then stream the canvas to the other participants in a WebRTC session.

Photo

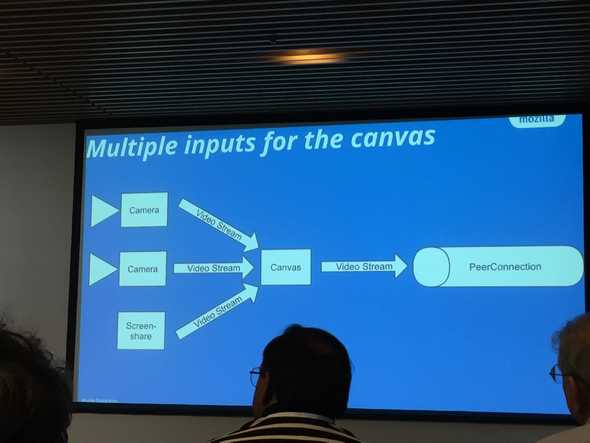
It is even possible to do video mixing by combining multiple video streams into a canvas, and then streaming the canvas out to other participants.

Photo

There were no performance numbers on the video mixing, and Ohlmeier recommended running your own tests to see how well it performed.Ohlmeier said in other tests, the demo was successful in video mixing up to eight streams using an Amazon EC2 instance.

Photo

Customer Experience

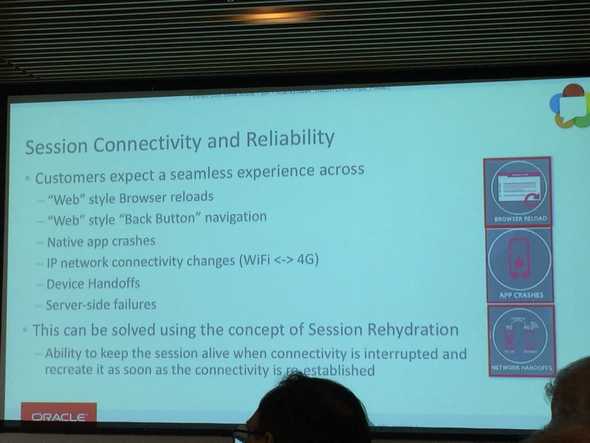
Amitha Pulijala from Oracle talked about how customer experience is important and to enable seamless journeys. Customers reloads the browser using the reload and the back buttons when things don’t appear to work correctly. Other things that cause reliability problems include native app crashes, IP network connectivity changes when switching between WiFi and 4G connections, and server-side failures.

Photo

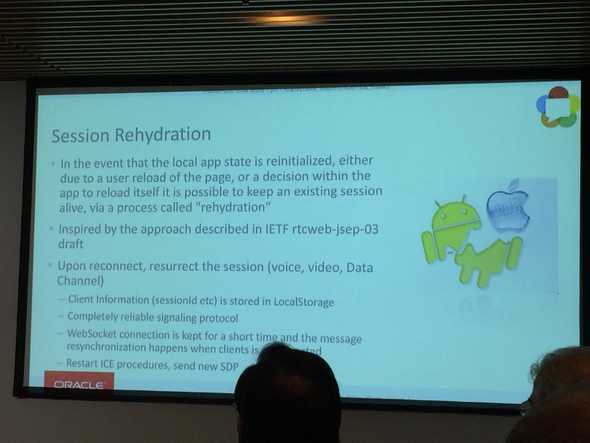
Using Session Rehydration, it is possible to keep an existing session alive, via a process called Session Rehydration. Upon reconnection, resurrect the session (voice, video and data channel) using client information stored locally (sessionId is stored in LocalStorage).

Photo

The WebSocket connection is kept for a short time and message resynchronization happens when a client is reconnected.

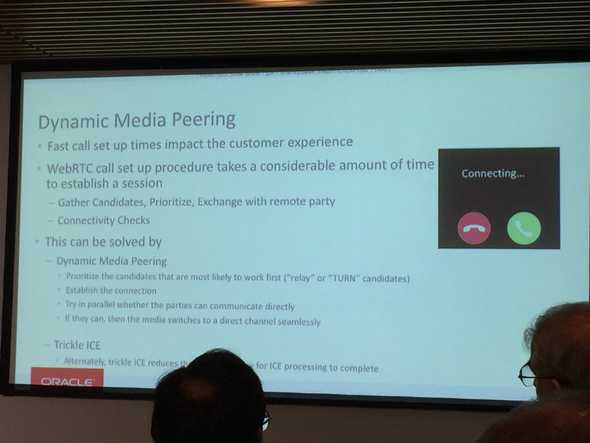
Customer expects the call setup time to be fast. However, WebRTC call setup takes a considerable amount of time. This takes time to gather candidates, prioritize, exchange with remote party, and perform connectivity checks.

Dynamic Media Peering prioritizes the candidates that are most likely to work first.

Photo

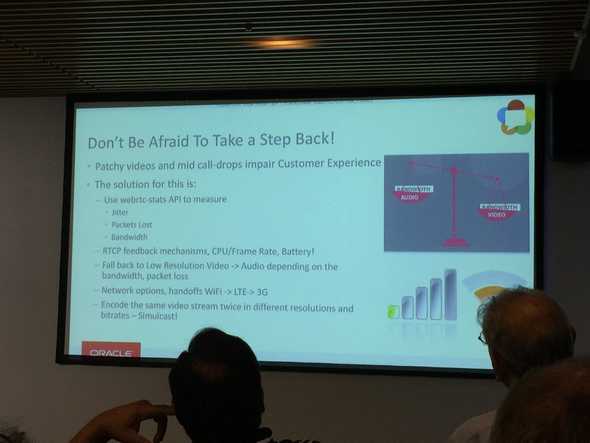
Another tip she talked about is to identify and solve weak points. Patchy videos and mid call-drops impair customer experience. Use the WebRTC-stats API to measure jitter, packets lost, and bandwidth.

Customers do not like if their video calls quickly drain the battery on their device. Using the WebRTC API, applications can measure the amount of jitter, packets lost, and bandwidth used and dynamically adjust to improve the experience. For example, to reduce packet loss, reduce the resolution of video and audio.

Photo

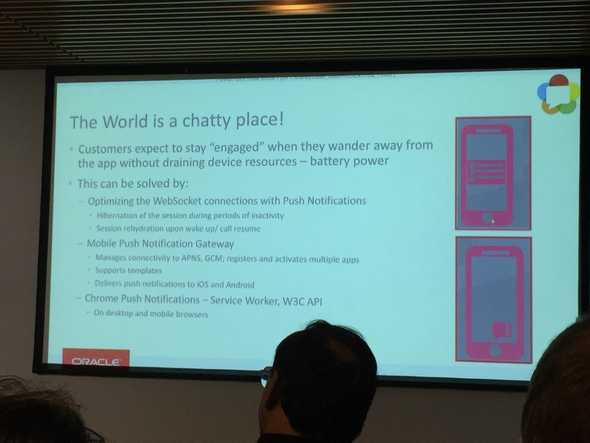
Lastly, when users wander away from the app, they expect to still be engaged, but not have their battery power sacrificed. Hibernating the session and using Push Notifications can help keep the user’s session available for when they return.

Photo

The sessions were recorded and have been posted on YouTube.

Smart TV Watcher with SmartThings

July 30, 2015 | Projects

Internet of Things has been a fascinating area of tech to watch. As more and more things become internet connected, the developer playground has expanded with countless possibilities. For example, when I open my front door, a door sensor triggers the system to turn on the lights of it is dark. When I walk out of a room, a motion sensor turns off the lights automatically, saving electricity and also the effort in flipping the light switch. I can also be notified via SMS when someone comes home.

It isn’t only about convenience, but can be functional. A water sensor can detect a water leak and turn off water valves, alert the homeowner about the problem, and prevent a huge disaster of a flooded basement.

I have a smart plug connected to my SmartThings hub. For the Internet of Things Devpost hackathon challenge, I built a web app that encourages couch potatoes to perform mental exercises in exchange for TV time. Each time the plug is switched on, it checks to see if there is TV time available and sets a timer for the specified time. When the time expires, the plug will turn off.

SmartThings

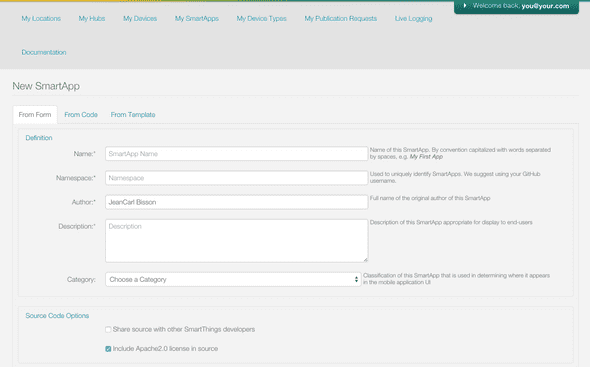
To monitor when the smart plug turns on, we need to create a SmartApp.

Photo

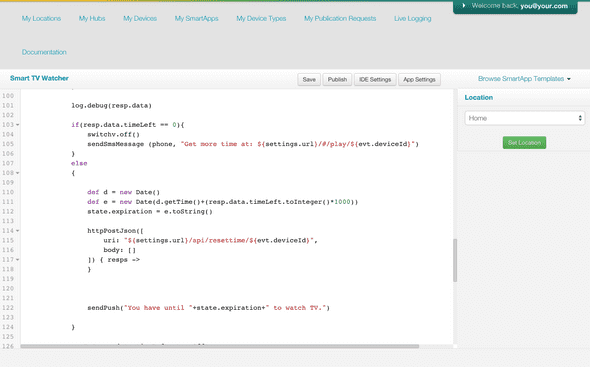
SmartThings has a webbased IDE to write apps and deploy them.

Photo

Open up the IDE and insert the following code:

/**
 /**
 *  SmartToWeb
 *
 *  Copyright 2015 JeanCarl Bisson
 *
 *  Licensed under the Apache License, Version 2.0 (the "License"); you may not use this file except
 *  in compliance with the License. You may obtain a copy of the License at:
 *
 *      http://www.apache.org/licenses/LICENSE-2.0
 *
 *  Unless required by applicable law or agreed to in writing, software distributed under the License is distributed
 *  on an "AS IS" BASIS, WITHOUT WARRANTIES OR CONDITIONS OF ANY KIND, either express or implied. See the License
 *  for the specific language governing permissions and limitations under the License.
 *
 */
definition(
    name: "Smart TV Watcher",
    namespace: "com.jeancarlbisson.smarttvwatcher",
    author: "JeanCarl Bisson",
    description: "Solve math problems and earn TV time. ",
    category: "Fun &amp; Social",
    iconUrl: "https://s3.amazonaws.com/smartapp-icons/Convenience/Cat-Convenience.png",
    iconX2Url: "https://s3.amazonaws.com/smartapp-icons/Convenience/Cat-Convenience@2x.png",
    iconX3Url: "https://s3.amazonaws.com/smartapp-icons/Convenience/Cat-Convenience@2x.png",
    oauth: true)

preferences {

    section("Webhook URL"){
        input "url", "text", title: "Webhook URL", description: "Your webhook URL", required: true
    }

    section("Choose what events you want to trigger"){
        input "switchv", "capability.switch", title: "Switch", required: false, multiple: true
    }
    
    section("Send a text message to this number") {
        input "phone", "phone", required: true
    }    
}

def installed() {
    log.debug "Installed with settings: ${settings}"
    subscribeToEvents()
    initialize()
}

def updated() {
    log.debug "Updated with settings: ${settings}"
    unsubscribe()
    subscribeToEvents()
}

def subscribeToEvents() {
    subscribe(app, appEventHandler)
    subscribe(switchv, "switch", eventHandler)
}

def appEventHandler(evt) {
    if(state.expiration != "") {
        sendPushMessage("You have until "+state.expiration+" to watch TV.");
    }
}

def eventHandler(evt) {
    if(evt.value == "on") { 
        httpPostJson([
            uri: "${settings.url}/api/gettime",
            body: [
                id: evt.deviceId, 
                displayname: evt.displayName, 
            ] 
        ]) { resp ->
            if(resp.data.timeLeft == 0){
                turnOff()
                sendSmsMessage(phone, "Get more time at: ${settings.url}/#/play/${evt.deviceId}")
            }
            else
            {
                def d = new Date()
                def e = new Date(d.getTime()+(resp.data.timeLeft.toInteger()*1000))
                state.expiration = e.toString()

                httpPostJson([
                    uri: "${settings.url}/api/resettime/${evt.deviceId}",
                    body: []
                ]) { resps ->
                }   

                sendPush("You have until "+state.expiration+" to watch TV.")
            }

            runIn(resp.data.timeLeft, turnOff)
        }
    } else {
        state.expiration = ""
    }
}

def turnOff() {
    switchv.off()
}

Setup

There are five files for this project. app.js is the Node.js that keeps track of the TV time earned. The AngularJS app, smartthings.js and index.html, use two views, a placeholder main.html and the game play.html.

// Filename: app.js

var PORT = 3000;
var MONGODB_ADDRESS = 'mongodb://127.0.0.1:27017/test';

var express = require('express');
var bodyParser = require('body-parser');
var url = require('url');
var mongoose = require('mongoose');

var app = express();

app.use(bodyParser.json());

mongoose.connect(MONGODB_ADDRESS);

var DeviceModel = mongoose.model('Device', {
  deviceId: String,
  deviceName: String,
  timeLeft: Number,  
});

// Creates a device profile if one doesn't exist, and returns the rewarded time.
app.post('/api/gettime', function(req, res) {
  DeviceModel.findOne({deviceId: req.body.id}, function(err, device) {
    if(err || !device) {
      DeviceModel.create({
        deviceId: req.body.id,
        deviceName: req.body.displayname,
        timeLeft: 0
      }, function(err, device) {
        if(err) {
          console.log(err);
          return;
        }
        
        res.send({timeLeft: device.timeLeft});
      });
    } else {
      res.send({timeLeft: device.timeLeft});  
    }
  });
});

// Returns the time that has been rewarded to this device.
app.get('/api/gettime/:deviceId', function(req, res) {
  DeviceModel.findOne({deviceId: req.params.deviceId}, function(err, device) {
    if(err || !device) {
      console.log(err);
      return;
    } else {
      res.send({timeLeft: device.timeLeft});  
    }
  });
});

// Resets the time that has been rewarded to this device.
app.post('/api/resettime/:deviceId', function(req, res) {
  DeviceModel.findOne({deviceId: req.params.deviceId}, function(err, device) {
    DeviceModel.update({deviceId: req.params.deviceId}, {
      timeLeft: 0
    }, function(err, numAffected) {
      res.send({timeLeft: device.timeLeft});
    });
  });
});

// Adds rewarded time to this device.
app.post('/api/addtime/:deviceId/:seconds', function(req, res) {
  DeviceModel.findOne({deviceId: req.params.deviceId}, function(err, device) {
    if(err || !device) {
      res.send({error: 'Device not registered.'});
    } else {
      device.timeLeft = device.timeLeft + parseInt(req.params.seconds);

      DeviceModel.update({deviceId: device.deviceId}, {timeLeft:device.timeLeft}, function(err, numAffected) {
        if(err) {
          console.log(err);
        }
      });

      res.send({timeLeft: device.timeLeft});  
    }
  });
});

app.listen(PORT);
console.log('Application listing on port '+PORT);

app.use(express.static(__dirname + '/public'));
// Filename: public/smartthings.js

angular.module('SmartTVWatcherApp', ['ngRoute'])
.config(['$routeProvider', function($routeProvider) {
  $routeProvider.
    when('/', {
      templateUrl: 'main.html',
    }).
    when('/play/:deviceId', {
      templateUrl: 'play.html',
      controller: 'GameCtrl'
    }).
    otherwise({
      redirectTo: '/'
    });
}])
.constant('SECONDS_FOR_CORRECT_ANSWER', 50)
.filter('secondsToDateTime', [function() {
    return function(seconds) {
        return new Date(1970, 0, 1).setSeconds(seconds);
    };
}])
.controller('GameCtrl', ['$scope', '$http', '$routeParams', 'SECONDS_FOR_CORRECT_ANSWER', function($scope, $http, $routeParams, POINTS_FOR_CORRECT_ANSWER) {
  $scope.timeLeft = 0;
  $scope.deviceId = $routeParams.deviceId;
  $scope.deviceName = $routeParams.deviceName;

  $http.get('/api/gettime/'+$scope.deviceId).success(function(response) {
    console.log(response);
    $scope.timeLeft = response.timeLeft;
  });

  $scope.generateProblem = function() {
    var a = Math.floor(Math.random()*10);
    var b = Math.floor(Math.random()*10);

    $scope.answer = a+b;
    $scope.problem = a+'+'+b+' = ?';
    $scope.answers = [a+b, a+b-1, a+b+1];

    for(var j, x, i = $scope.answers.length; i; j = Math.floor(Math.random() * i), x = $scope.answers[--i], $scope.answers[i] = $scope.answers[j], $scope.answers[j] = x);
  }

  $scope.checkAnswer = function(answer) {
    if($scope.answer == answer) {
      $http.post('/api/addtime/'+$scope.deviceId+'/'+SECONDS_FOR_CORRECT_ANSWER).success(function(response) {
        $scope.timeLeft = response.timeLeft;
        $scope.generateProblem();
      });
    } else {
      alert('Not quite!');
      $scope.generateProblem();
    }
  }

  $scope.generateProblem();
}]);
<!-- Filename: public/index.html -->

<!DOCTYPE html> 
<html ng-app="SmartTVWatcherApp">

<head>
  <meta charset="utf-8">
  <meta name="viewport" content="width=device-width, initial-scale=1"> 
  <title>Smart TV Watcher</title> 
  <script src="https://ajax.googleapis.com/ajax/libs/angularjs/1.3.16/angular.min.js"></script>
  <script src="https://ajax.googleapis.com/ajax/libs/angularjs/1.2.1/angular-route.min.js"></script>
  <script src="smartthings.js"></script>
</head> 

<body style="font-family:Arial"> 

<div ng-view></div>
  

</body>
</html>
<!-- Filename: public/main.html -->

<h2>Smart TV Watcher</h2>

<p>Please access this app through the SmartThings SmartApp.</p>
<!-- Filename: public/play.html -->

<div style="text-align:right">TV Time Earned: {{timeLeft | secondsToDateTime | date:"HH:mm:ss"}}</div>

<div style="font-size:36pt; text-align:center">
{{problem}}
</div>

<div style="text-align:center">
  <div ng-repeat="answer in answers" style="padding-top:10px">
    <input type="button" ng-click="checkAnswer(answer)" value="{{answer}}" style="font-size:20pt; width:100%; height:50px" />
  </div>
</div>

<div style="color:#C0C0C0; padding:20px">
  When you have accrued enough time to watch a TV show, return to the SmartThings app and tap on the switch to turn it on. 
</div>
// Filename: package.json
{
  "name": "hear-it",
  "description": "Smart TV Watcher game for Node.js",
  "version": "0.0.1",
  "private": true,
  "dependencies": {
    "express": "*",
    "url": "",    
    "body-parser": "*",
    "mongoose": "*"
  }
}

Install the Node.js dependencies by running this command:

npm install

And start the Node.js app by running this command:

nodejs app.js

Smart TV Watcher

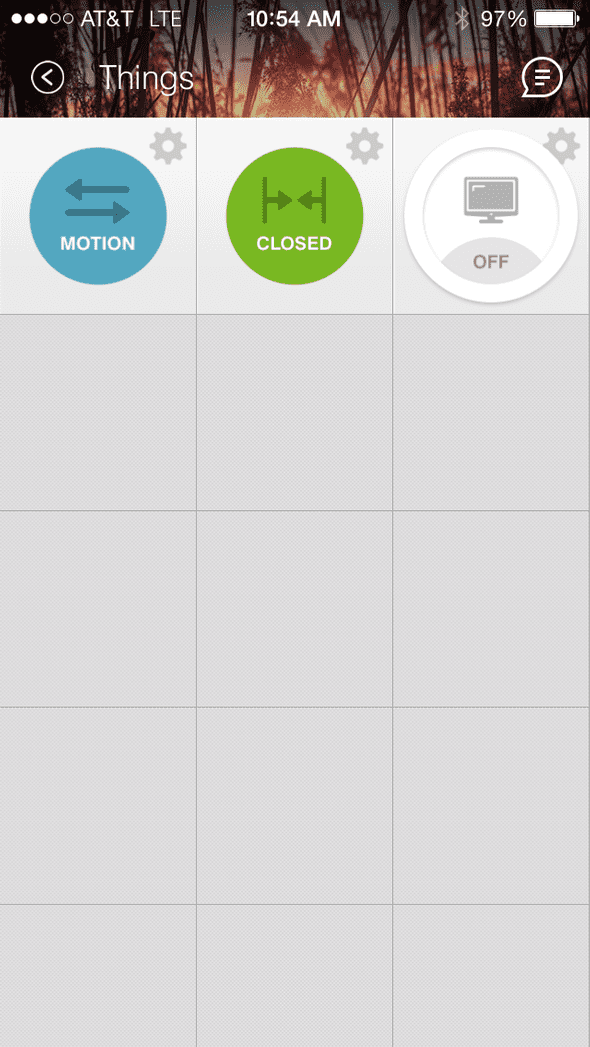
This is the SmartThings iOS app. You can turn on and off switches, and receive notifications when certain triggers happen, such as when a door opens.

Photo

The third icon represents the switch that is connected to my television. If I tap on it, it will turn the switch on. However, since Smart TV Watcher is listening for this event, it will override the switch. The Smart TV Watcher app checks the Node.js application to see if there is any TV time earned.

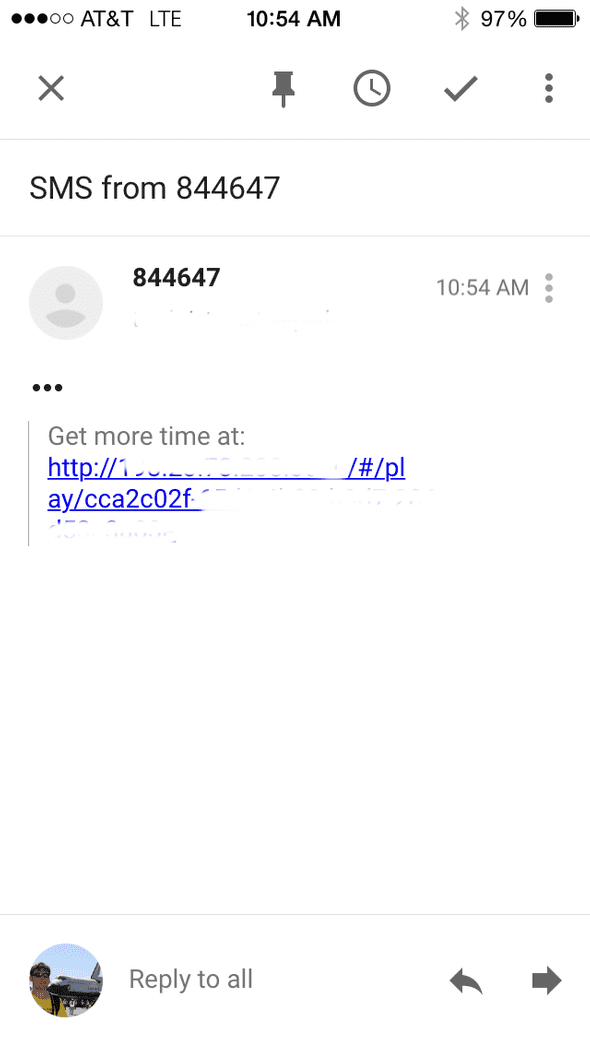
A text message is sent since there is no time earned.

Photo

Photo

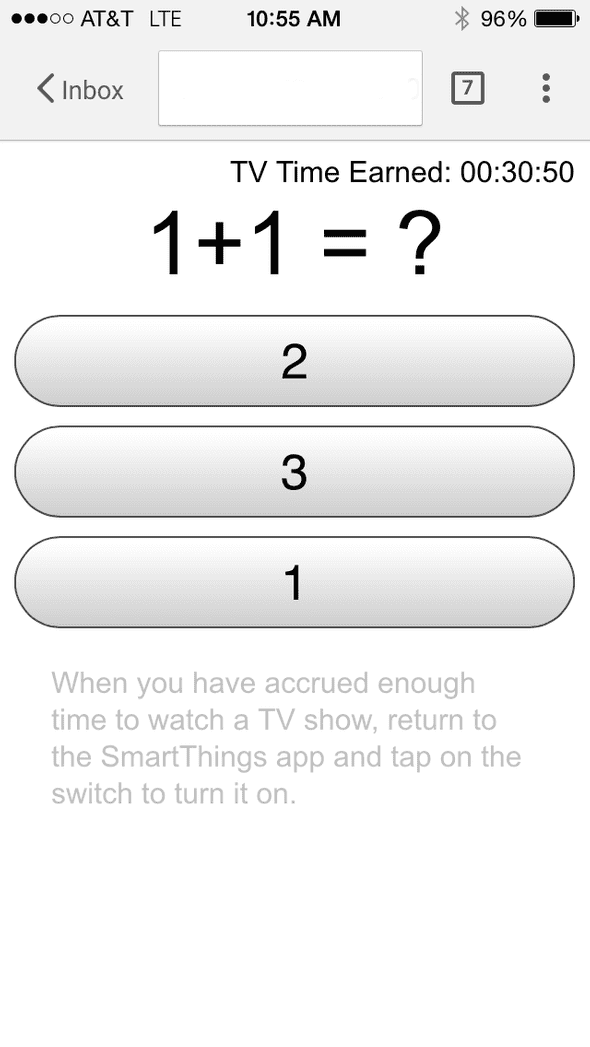
Following the link in the text message, I am taken to the Smart TV Watcher web app. This is a simple artimethic game of addition. For each problem I solve correctly, I earn 50 seconds of TV time. After solving 37 math problems (which took me less than a minute), the screen looks like this:

Photo

After I earn 30 minutes of TV time, I return back to the SmartThings app and turn the switch on. This time, since I have TV time available, the switch stays on. A notification shows at the top letting me know how long I have.

Photo

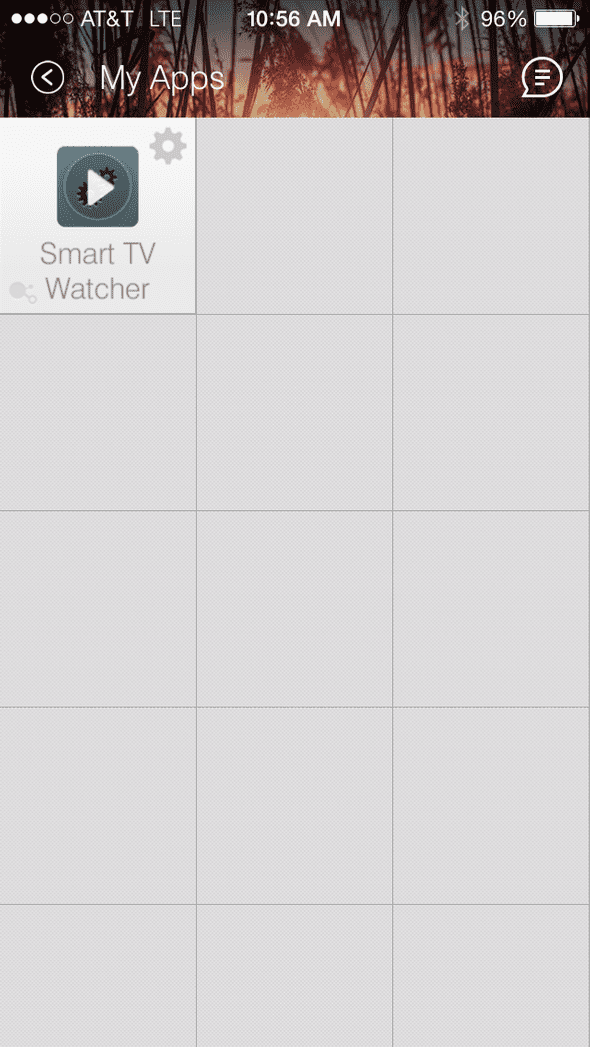
At any point, I can also access the SmartApps screen and tap on the Smart TV Watcher app to find out how long I have until the switch turns off.

Photo

Photo

I can go back in and solve more math problems to earn additional time. Otherwise, at the specified time the switch will turn off and my TV watching ends.

Source Code

You can find the repo on Github.

Post Mortem

This was a fun project to build. I have never used Groovy, so I got to learn the “Groovy” syntax. The SmartThings platform is pretty simple yet powerful with the event based actions that you can subscribe and respond to.

In the future, the amount of TV time that can be earned could be adjustable and the math problems could be more challenging the longer you watch TV. This application could also apply to limiting how long you play with game consoles, and other things that require electricity. Perhaps I have to solve math problems to heat up my food in the microwave.

Which reminds me, I have some TV to watch!

Remind Me API with Apiary

July 28, 2015 | Projects

Remind Me was my first project in my 15 projects in 30 days challenge. It was a web app that allowed you to enter a phone number, message, and choose a date and time for the message to be texted.

I took a second look at this project for the DevPost First API challenge sponsored by Apiary. Apiary is a platform that helps you create an API and maintain up-to-date documentation.

If you’ve ever used an API before, you may have come across documentation that lagged behind the actual implementation. Good API documentation also provides examples of request and response bodies and how you can interact with the API. Apiary helps to solve these problems when creating an API.

Remind Me was a great example of a project that could use an API. Here’s the process I took to make Remind Me accessible as both a web app, and also as an API.

Setup

I modified the original project to clean up some things and make API endpoints more intuitive. There are three files for this project. app.js is the Node.js backend that handles the web interface and also the API endpoints. The AngularJS app, index.html and remindme.js provide the web app interface.

// Filename: app.js

// Twilio Account SID
var TWILIO_ACCOUNT_SID = '';

// Twilio Auth Token
var TWILIO_AUTH_TOKEN = '';

// Twilio phone number to send SMS from.
var TWILIO_NUMBER = '';

// Set to how frequently the queue should be checked.
var frequencyMilliseconds = 5000;

// Mongo DB server address
var mongooseServerAddress = 'mongodb://127.0.0.1:27017/test';

// Port
var PORT = 8080;

/*********** End Configuration ***********/

var express = require('express');
var app = express();
var bodyParser = require('body-parser');
var url = require('url');
var mongoose = require('mongoose');

app.use(bodyParser.json());
app.listen(PORT);

mongoose.connect(mongooseServerAddress);

var Reminder = mongoose.model('Reminder', {
  message: String,
  sendon: Number,
  to: String
});

var client = require('twilio')(TWILIO_ACCOUNT_SID, TWILIO_AUTH_TOKEN);

// Create a new reminder.
app.post('/api/reminders', function(req, res) {
  var time = new Date(req.body.sendon);

  Reminder.create({
    message: req.body.message,
    sendon: time.getTime(),
    to: req.body.to
  }, function(err, reminder) {
    if(err) {
      res.send({'error': 'Could not create reminder.'});
      return;
    }

    res.send({
      'message': reminder.message, 
      'sendon': reminder.sendon, 
      'to':reminder.to, 
      'id': reminder._id
    });
  });
});

// Get a reminder.
app.get('/api/reminders/:id', function(req, res) {
  Reminder.findOne({_id: req.params.id}, function(err, reminder) {
    if(err || !reminder) {
      res.statusCode = 404;
      res.send({'error': 'Reminder not found'});
    } else {
      res.send({
        'message': reminder.message, 
        'sendon': reminder.sendon, 
        'to':reminder.to, 
        'id': reminder._id
      });
    }
  });
});

// Cancel a reminder.
app.post('/api/reminders/:id/remove', function(req, res) {
  // To make the default test succeed, this returns a success response and doesn't remove a reminder. 
  if(req.params.id == '55b6858b50f3e68f4d48dd41') {
    res.send({'status': 'success'});
    return;
  }

  Reminder.findOne({_id: req.params.id}, function(err, reminder) {
    if(err || !reminder) {
      res.send({'error': 'Reminder not found'});
      return;
    }
  
    Reminder.remove({_id: req.params.id}, function(err) {
      if(err)
        res.send({'error': 'Reminder not found'});

      res.send({'status': 'success'});
    });
  });
});

// Get list of reminders for phone number.
app.get('/api/phone/:number/reminders', function(req, res) {
  Reminder.find({to: req.params.number}, function(err, reminders) {
    if(err) {
      res.send({'reminders':[]});
      return;
    }

    var result = [];

    for(var i in reminders) {
      result.push({
        'sendon': reminders[i].sendon, 
        'message': reminders[i].message,
        'id': reminders[i]._id
      });
    }

    res.send({'reminders': result});
  });
});

setInterval(function() {
  var timeNow = new Date();
  console.log(timeNow.getTime());

  // Find any reminders that have already passed, process them, and remove them from the queue.
  Reminder.find({'sendon': {$lt: timeNow.getTime()}}, function(err, reminders) {
    if(err)  {
      console.log(err);
      return;
    }

    if(reminders.length == 0) {
      console.log('no messages to be sent');
      return;
    }

    reminders.forEach(function(message) {
      client.messages.create({
          body: message.message,
          to: '+1'+message.to,
          from: '+1'+TWILIO_NUMBER
      }, function(err, sms) {
        if(err) {
          console.log(err);
          return;
        }

        console.log('sending '+message.message+' to '+message.to+' ('+sms.sid+')');
      });
      
      Reminder.remove({_id: message._id}, function(err) {
        console.log(err)
      });
    });
  });
}, frequencyMilliseconds);

app.use(express.static(__dirname + '/public'));

console.log('App listening on port '+PORT);
// Filename: public/remindme.js

angular.module('ReminderApp', [])
.controller('ReminderListCtrl', ['$scope', '$http', '$filter', function($scope, $http, $filter) {
  $scope.reminderDate = new Date();
  $scope.reminderTime = new Date();
  $scope.reminderTime.setMilliseconds(0);
  $scope.reminderTime.setSeconds(0);
  $scope.syncing = false;

  $scope.reminders = [];

  // Get reminders from the server.
  $scope.fetchList = function() {
    if($scope.phonenumber.length == 0) 
      return;

    $scope.syncing = true;
    
    $http.get('/api/phone/'+$scope.phonenumber+'/reminders').success(function(response) {
      $scope.reminders = response.reminders;
      $scope.syncing = false;
    });
  };

  $scope.addReminder = function() {
    var reminderDateTime = new Date($filter('date')($scope.reminderDate, 'yyyy-MM-dd')+" "+$filter('date')($scope.reminderTime, 'HH:mm'));

    var data = {
      message: $scope.reminderText, 
      sendon: reminderDateTime.getTime(), 
      to: $scope.phonenumber
    };

    $http.post('/api/reminders', data).success(function(response) {
      $scope.reminders.push(response);
      $scope.reminderText = '';
    });
  };

  $scope.removeReminder = function(reminder) {
    var oldReminders = $scope.reminders;

    $scope.reminders = [];
    angular.forEach(oldReminders, function(r) {
      if(reminder.id != r.id) {
        $scope.reminders.push(r);
      }
    });

    $http.post('/api/reminders/'+reminder.id+'/remove');
  };
}]);
<!-- Filename: public/index.html -->

<!DOCTYPE html> 
<html ng-app="ReminderApp">
  <head>
    <meta charset="utf-8">
    <meta name="viewport" content="width=device-width, initial-scale=1"> 
    <title>Remind Me!</title> 
    <link rel="stylesheet" href="http://code.jquery.com/mobile/1.1.1/jquery.mobile-1.1.1.min.css" />
    <script src="http://code.jquery.com/jquery-1.7.1.min.js"></script>
    <script src="http://code.jquery.com/mobile/1.1.1/jquery.mobile-1.1.1.min.js"></script>
    <script src="https://ajax.googleapis.com/ajax/libs/angularjs/1.3.16/angular.min.js"></script>
    <script src="remindme.js"></script>
  </head> 

  <body> 

    <div data-role="page">

      <div data-role="header" data-theme="b">
        ## Remind Me!
      </div><!-- /header -->

      <div data-role="content"> 
        <div ng-controller="ReminderListCtrl">
          <h3>My Phone #</h3>
          <input type="text" ng-model="phonenumber" ng-blur="fetchList()" />
          
          <h3>My Reminders <div ng-show="syncing">Syncing...</div></h3>
          <ul data-role="listview" data-inset="true" data-split-icon="delete" data-split-theme="d">
            <li ng-repeat="reminder in reminders | orderBy:'time'">
              <a href="#" ><h2>{{reminder.message}}</h2>
              <p>{{reminder.sendon | orderBy: 'reminder.sendon' | date:"MM/dd hh:mm a"}}</p>
              <a href="#" ng-click="removeReminder(reminder)" data-rel="popup" data-position-to="window" data-transition="pop">Remove Reminder</a>
            </a>
            </li>
          </ul>
          <div ng-hide="reminders.length > 0">
            You have no reminders!
          </div>
          
          <form ng-show="phonenumber.length == 10">
            <h3>New Reminder</h3>
            <input type="text" ng-model="reminderText"  size="30"
                   placeholder="remind me about..."> 
            <div class="ui-grid-a">
              <div class="ui-block-a">
                on<br />
                <input type="date" ng-model="reminderDate" />
              </div>
              <div class="ui-block-b">
                at<br />
                <input type="time" ng-model="reminderTime"/>
              </div>
            </div>
            <input class="btn-primary" type="button" ng-click="addReminder()" value="Add">
          </form>
        </div>
      </div><!-- /content -->
      
      <div data-role="footer" data-theme="b">
        <h4>Copyright (c) JeanCarl Bisson</h4>
      </div><!-- /footer -->
      
    </div><!-- /page -->
  </body>
</html>
// Filename: package.json
{
  "name": "remind-me-api",
  "description": "Remind Me API for Node.js",
  "version": "0.0.1",
  "private": true,
  "dependencies": {
    "body-parser": "",
    "express": "*",
    "url": "*",
    "mongoose": "*",
    "twilio": "*"
  }
}

Install the Node.js dependencies:

npm install

And run the Node.js app:

nodejs app.js

Apiary

Apiary can be used in several different ways. You can design your API from the ground up with mock data from the mock server, or you can add existing API endpoints into the documentation.

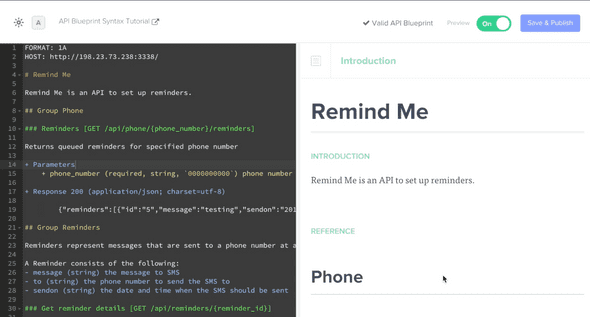
On the left column is an editor to build the Blueprint. On the right column is the rendered documentation.

Photo

Since I already had endpoints to add, remove, and list reminders, I renamed them and documented them in the API Blueprint. While constructing the blueprint, I realized that the list of reminders would be better under a phone endpoint instead of under a reminder endpoint.

/phone/*****/reminders

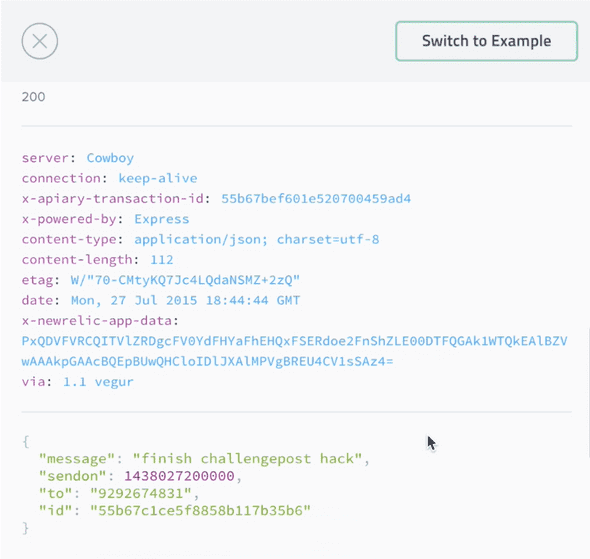
This would allow future expansion for a phone to have other objects along with the reminders. I took the traditional approach of using the GET HTTP method to retrieve a reminder, and POST HTTP method to create a new reminder. On the right column, you can choose an API endpoint and execute it.

Photo

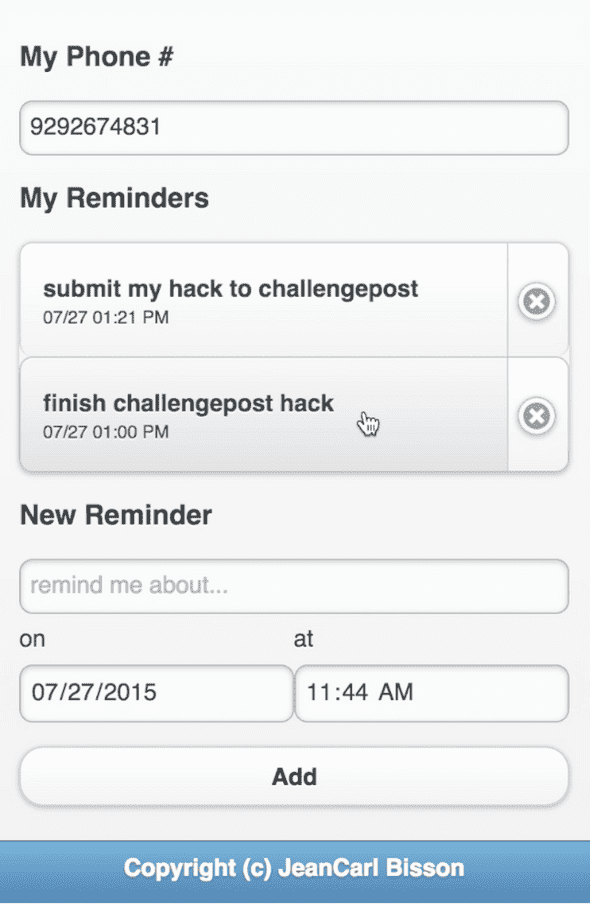
Going back to the web app, the reminder has been added.

Photo

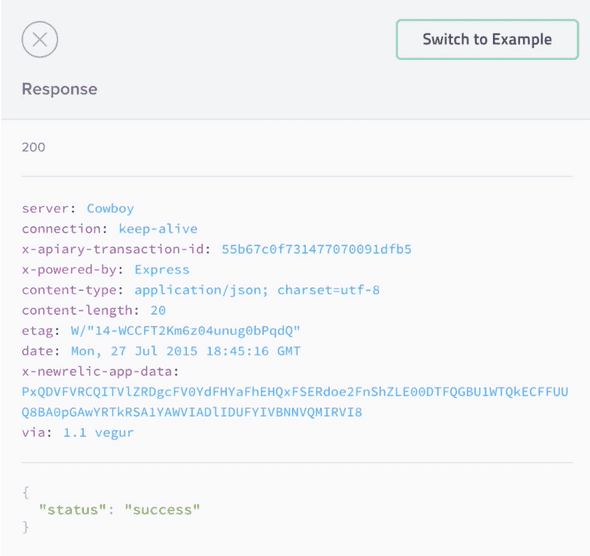
I chose to add a remove endpoint for the reminder entity instead of using the DELETE HTTP method for simplicity. Again, I ran a test to the API to make sure the API was working as expected.

Photo

Using mock data helped to visualize exactly what data should be returned and if a name should be changed. Then changing the endpoint to my production API ensured everything was consistent.

Here’s the API Blueprint (change the 0.0.0.0:8080 host value to point to where you host Remind Me):

FORMAT: 1A
HOST: http://0.0.0.0:8080/

# Remind Me

Remind Me is an API to set up reminders.

## Group Phone

### Reminders [GET /api/phone/{phone_number}/reminders]

Returns queued reminders for specified phone number

+ Parameters
    + phone_number (required, string, `0000000000`) phone number to find reminders for

+ Response 200 (application/json; charset=utf-8)

        {"reminders":[{"id":"55b6858b50f3e68f4d48dd41","message":"testing","sendon":"2018-07-31 06:38:48"}]}

## Group Reminders

Reminders represent messages that are sent to a phone number at a specified time.

A Reminder consists of the following:
- message (string) the message to SMS
- to (string) the phone number to send the SMS to
- sendon (string) the date and time when the SMS should be sent

### Get reminder details [GET /api/reminders/{reminder_id}]

Returns the details of the reminder, including the message to be sent, where the SMS will be sent to, and when the SMS will be sent.

+ Parameters
    + reminder_id (required, string, `55b6858b50f3e68f4d48dd41`) ID of the reminder

+ Response 200 (application/json; charset=utf-8)

        {"id":"55b6858b50f3e68f4d48dd41","message":"testing","to":"0000000000"}


### Create a reminder [POST /api/reminders]

Create a reminder that will send a message to the specified phone number on the specified date.

+ Request (application/json)

    + Body
    
            {"message":"testing","to":"0000000000","sendon":"2018-07-27 13:00:00"}
        
+ Response 200 (application/json; charset=utf-8)

        {"id":"55b6858b50f3e68f4d48dd41","message":"testing","to":"0000000000"}

### Cancel a reminder [POST /api/reminders/{reminder_id}/remove]

Removes the reminder from the queue so that it is not sent.

+ Parameters
    + reminder_id (required, string, `55b6858b50f3e68f4d48dd41`) ID of the reminder

+ Request (application/json)

+ Response 200 (application/json; charset=utf-8)

        {"status":"success"}

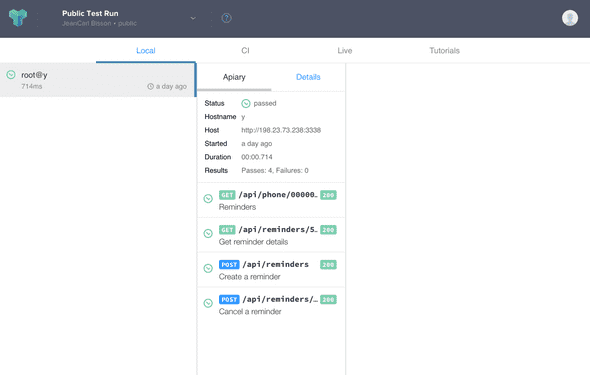
Lastly, you can run tests against the production API to make sure it matches with the documentation. Some of the tests failed at first and made it easy to fix the inconsistencies before they were live and caused issues that might have been harder to track down.

Install Dredd, an HTTP API Testing Framework:

npm install -g dredd

And then run the test:

dredd apiary.apib

Photo

Using the diff tool after the tests run, you can see the differences and take appropriate action.

Photo

Source code

You can find the repo on Github.

Post Mortem

Apiary was a little confusing to use at first. The API Blueprint syntax takes a little time to get used to. But once you understand it, the process is pretty smooth.

I really liked the mock data where Apiary will mock up all the sample responses at an accessible URL. Theoretically, you could then access this URL and play around with the experience of being a client user.

Lastly, testing using the dredd command line tool was great. After making a small change, I would run the tests again to see if everything functions still. It adds confidence to the system.