Connected Teddy Bear
November 21, 2015 |
What if a parent could keep track of how their child’s moods fluctuates? This might sound creepy, but here’s a scenario. A father is away from home on a business trip and has limited communication, let’s say via text messaging. Could an interaction through a toy, such as a stuffed teddy bear, bridge the parent and child and offer a (fun) way to communicate?
That was the hack I worked on during this past weekend. We ended up using an Intel Edison board that prompted the child to select one of five emotions: sadness, disgust, anger, fear, and joy. The parent receives a text message and can either send a custom message back to the child via the LCD, or can choose to send a message provided by a third-party.
Through multiple interactions with the toy, a parent can understand the emotions that a child goes through via a dashboard. Without going into depth in child psychology, a child may suffer certain emotions during periods where a parent is away from home for an extended time.
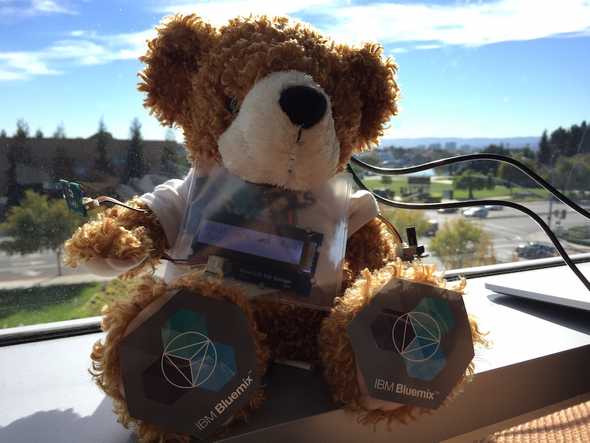
Here’s how I built the connected Teddy Bear. Here’s what you’ll need if you’re interested in building something like this:
- a Bluemix account (free 30-day trial)
- an Intel Edison board, with a rotary dial, a button, and LCD from the Seeed's Grove Kit.
- a Twilio account
Node-RED
To code the logic of Alex, we’ll use Node-RED. Node-RED is an easy to use graphical interface that offers different functionality (called nodes) that are connected together to construct flows. These flows can be triggered by manual injection, HTTP requests or by incoming IBM IoTF events, to name just a few of many options.
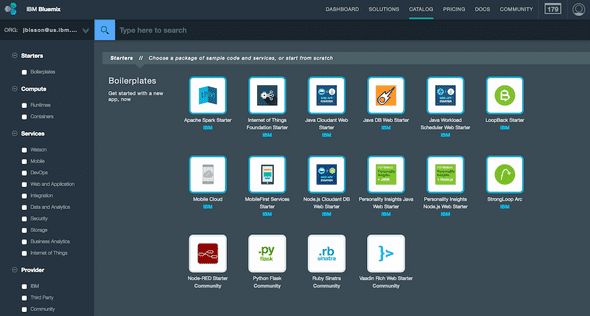
Sign up for IBM Bluemix. In the Bluemix Catalog under Boilerplates, there’s a Node-RED Starter.
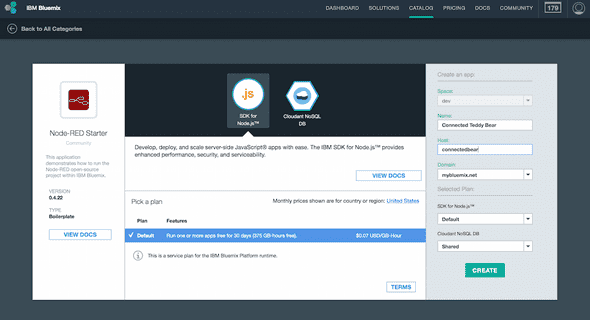
Choose a name for the application and a host. I chose connectedbear as the host, so my Node-RED application is available at http://connectedbear.mybluemix.net/red. Click Create.
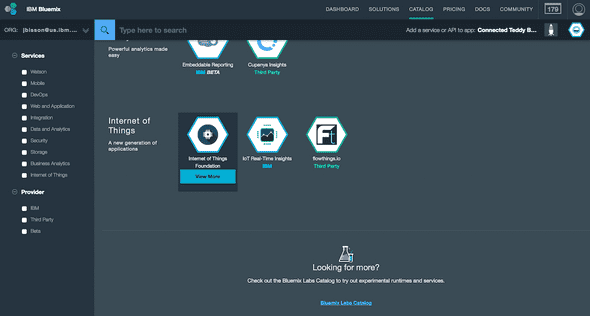
This will create a Node-RED application, with a Cloudant DB backend. The application will stage and then start. Click on the Overview link in the left sidebar. We need to add an IBM Internet of Things Service so that the bear can talk to the Internet. Click on Add a Service or API. In the Internet of Things category, choose the Internet of Things Foundation service.
You can name the service, or use the default name. The important part is that the application is selected for which you want to bind the Internet of Things service to.
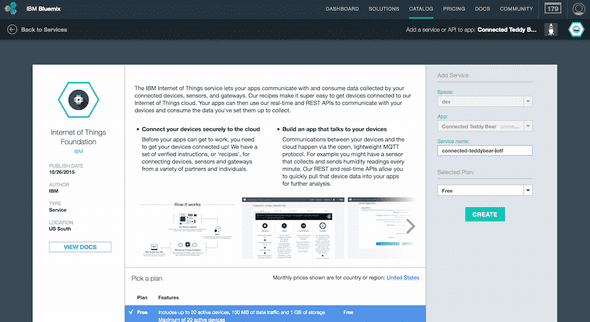
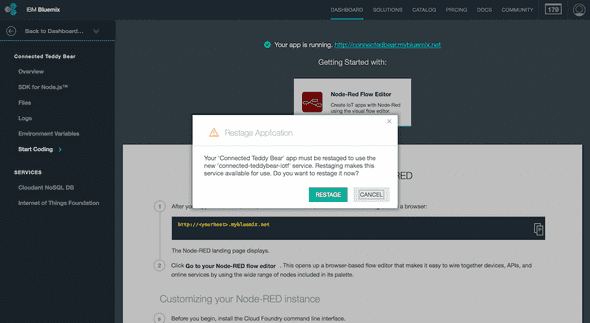
If prompted to Restage the application, click Restage.
Register Device
In order for the bear to send device events and receive commands from the Internet of Things Foundation service, we need to register the device. In the application overview, click on the Internet of Things Foundation service in the left sidebar. Then click on Launch dashboard.
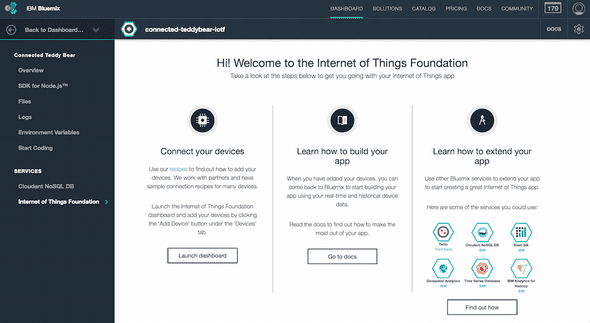
This is where you can manage the connected devices and the connected applications. First, we need to define a device type. The device type is a way to categorize the types of objects that connect to the service and can make it easier later on to target specific types of objects. For example, in the future there might be both a bear and a penguin. The penguin could offer more functionality and our program could send additional commands to specially the penguin device type.
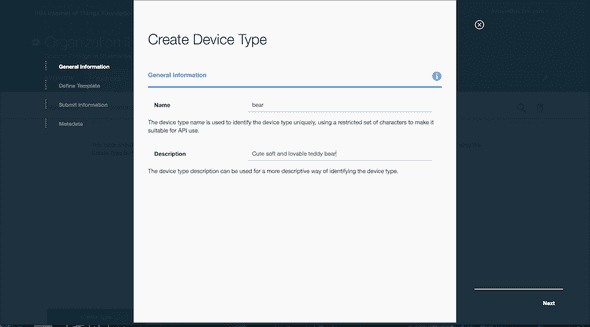
To create a new device type, under the Device Types tab, click on the Create Type button. Enter the device name, bear, and a description. Click Next to skip through the rest of the screens. They can be left with the default values.
Now we have one device type. Let’s register the Intel Edison board we have as a device. Click on the Devices tab, and then the Add Device button. The device type we just added appears in the list. Select it and click Next.
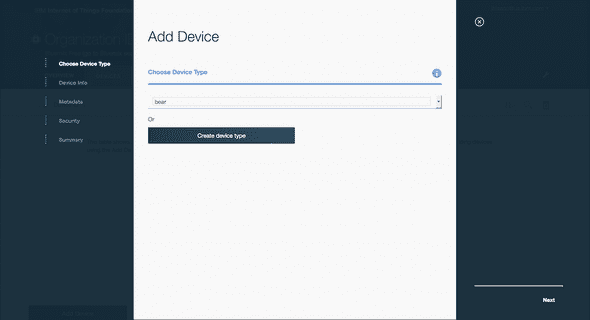
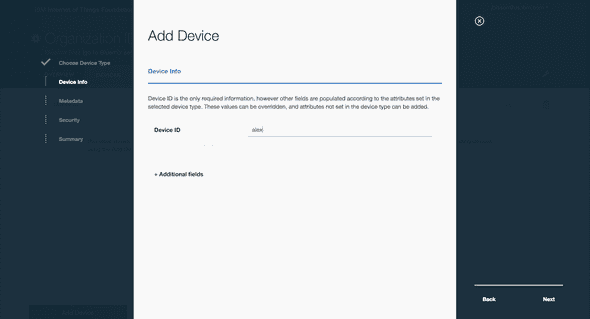
The Device ID is a unique identifier for this device. Since this is a small demo, I’m going to use a friendly name, alex. However, it might be better to use a naming system that allows for tons of these devices to be uniquely identified. Maybe using something like alex-0000001 that sequentially increases would support millions of these units of our Alex model.
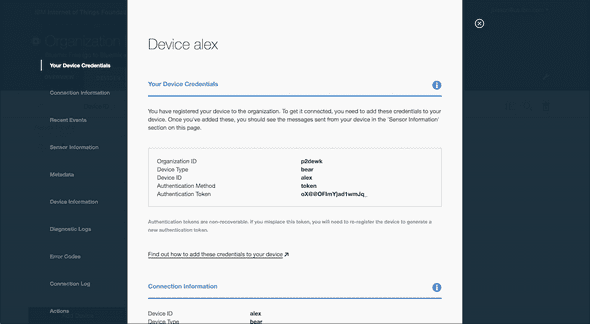
Click Next and skip through the screens until you get to the Device Credentials summary screen. Copy down the Organization ID, the Device ID, and the Authentication Token. This is the only time you’ll be able to see the Authentication Token. If you lose this token, you can delete and re-add the device. However, a new Authentication Token will be automatically generated.
Constructing the Teddy Bear
I used an Intel Edison board with a Grove starter kit from Seeed. You’ll need:
- 1 Intel Edison Board
- 1 Grove Base Shield
- 3 Grove Cables
- 1 Grove Rotary Angle Sensor
- 1 Grove Button
- 1 Grove LCD RGB Backlight
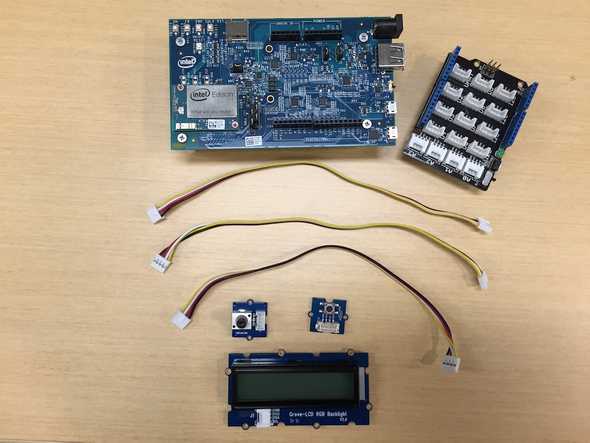
Connect the Rotary Angle Sensor to port A0. Connect the Grove Button to port D2. Connect the LCD RGB Backlight to port I2C.
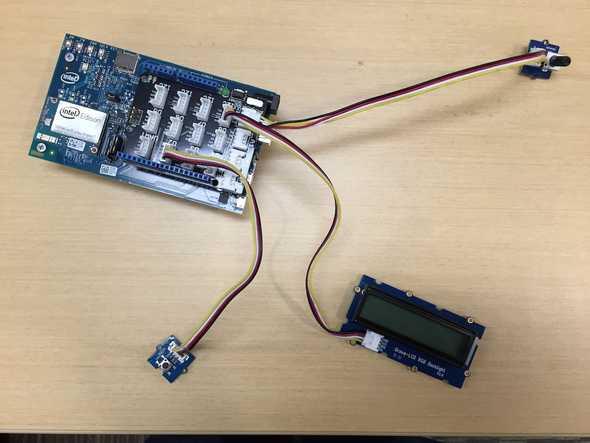
I won’t detail the process of flashing the Edison board. Check out the Getting Started guide from Intel. Download the client folder from my repo and modify the app.js file.
Using the Organization ID, the Device ID, and the Authentication Token values from the previous step, modify the following lines:
// Set up the IBM IoTF device client.
var deviceClient = new require('ibmiotf').IotfDevice({
  'org': '-----', // Organization ID
  'type': 'bear',
  'id': '-----', // Device ID
  'auth-method': 'token',
  'auth-token': '-----' // Authentication Token
});
Copy these files onto the Intel Edison.
Twilio
Twilio is a very developer friendly platform to send and receive text messages. Sign up for an account and create a phone number.
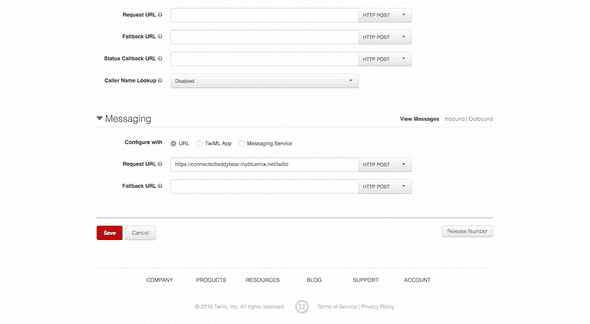
In the Messaging settings for the newly created phone number, enter your Node-RED application URL, appended with /twilio. My application host was connectedteddybear, so the value I would use is https://connectedteddybear.mybluemix.net/twilio . Click Save.
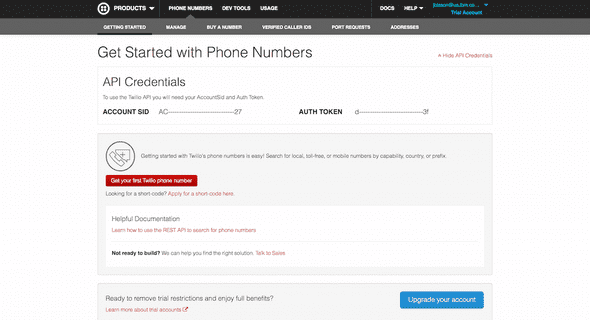
Lastly, click on Getting Started. There’s a Show API Credentials link in the top right corner. Copy these credentials.
Control logic in Node-RED
We’ve set up the Intel Edison to send and receive events, but where’s the heart of the bear? That’s where Node-RED comes in. Using a graphical interface, we’ll make stuff happen with very little code. Well, sort of. Import the following JSON, which represents all the nodes.
Copy the following block, or you can find it in the file named noderednodes.txt.
In Node-RED, click the Menu icon in the top right, then Import, then Clipboard.
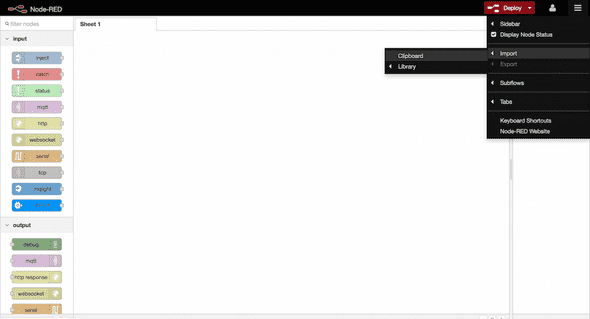
Paste the nodes in the textbox.
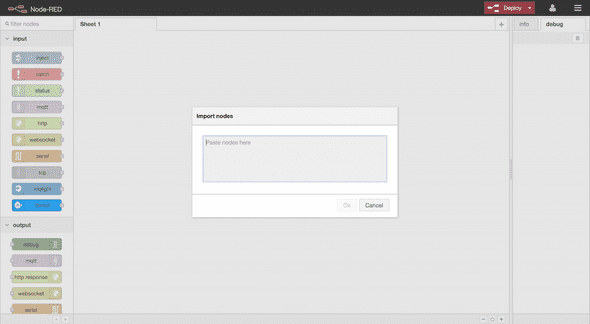
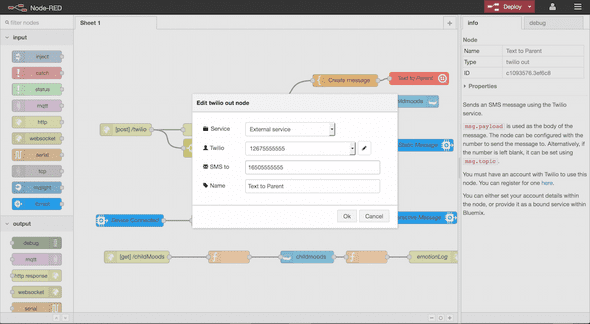
Add a Twilio node and connect it to the Create message node in the top right. The Twilio node needs to be configured with the API credentials, the Twilio phone number you created, and a number to send text messages to.
Connected Teddy Bear
Start the Node.js application on the Intel Edison by running the command:
node app.jsThe Teddy Bear should connect to the Internet of Things Foundation, send a connect command to the Node-RED application, which will send down an emotion prompt.
# node app.js
[2015-11-21 02:39:00.885] [INFO] [default] - Connected to IoTF successfully
Teddy bear connected
Command :: interactive with payload : {"interactive":true, "text": ["What are you feeling?", ""], "options":["Joy", "Fear", "Anger", "Disgust", "Sadness"]}

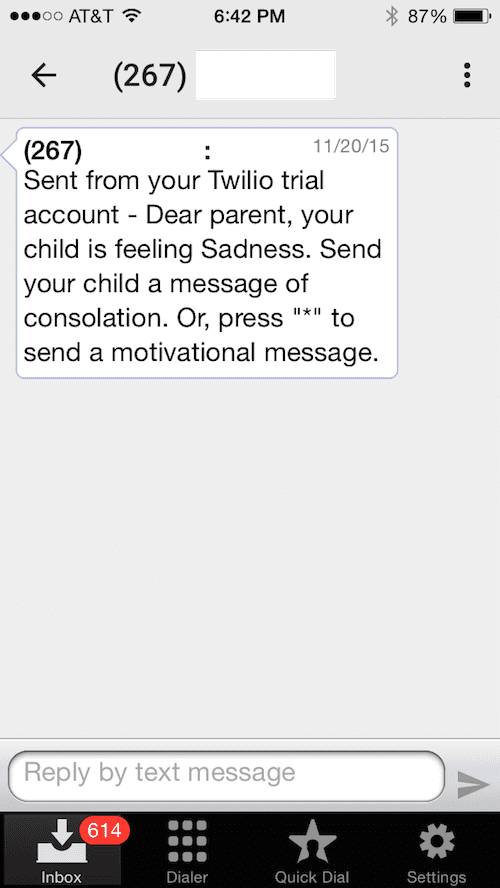
Turn the Rotary Angle Sensor to change the option. Press the button to submit the emotion to the Internet of Things, which sends it to the Node-RED application. The Node-RED application will construct a message using this value, and send it to Twilio to send a text message. The Node-RED application also saves this emotion response in the CloudantDB.
Text a * back to the Twilio phone number to get a motivational quote, a # to prompt for another emotion response, or any other message to send a custom message back to be displayed on the Teddy Bear.
Emotion Dashboard
Now that the emotions are being collected in the Cloudant DB, let’s create a dashboard to see the statistics. How often is the child feeling a certain emotion?
In the repo, download the server folder. In the app.js, change the URL to point to the endpoint in Node-RED application you created earlier.
...
$http.get('http://<strong>connectedbear</strong>.mybluemix.net/childMoods').then(function(response) {
  $scope.moods = response.data;

  var moods = {};
  for(var i in $scope.moods) {
...
The next part is optional. You can choose a custom host name for the dashboard, or use the default one. The default host will choose a random word and add it to the following URL teddybear-.***.mybluemix.net.
You can customize it by modifying the manifest.yml file, and changing the host value:
applications:
- name: connected-teddy-bear-${random-word}
  memory: 64M
  host: <strong>teddybear-${random-word}</strong>
  buildpack: https://github.com/cloudfoundry/staticfile-buildpack.git
This manifest file will use the static file build pack from Cloud Foundry, and deploy this to simple web application to Bluemix. Before pushing this application to Bluemix, download and install the Cloud Foundry command line tool. To push the application, run the command:
cf pushNow you can open a browser and view the dashboard:
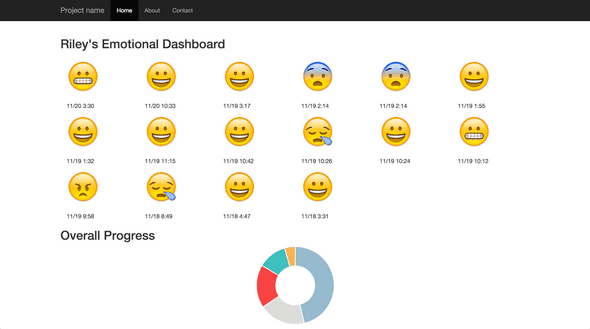
This AngularJS web application dashboard can be extended. Some ideas include:
- Be able to push a question/answer set to the teddy bear from the web application.
- Build a chat application, where the bear can respond given a defined set of answers.
- Schedule messages to be sent to the bear, in time for a child's bedtime, or when she wakes up.
Think of all the possibilities!